> For the complete documentation index, see [llms.txt](https://upgrade-platform.gitbook.io/upgrade-documentation/llms.txt). Markdown versions of documentation pages are available by appending `.md` to page URLs; this page is available as [Markdown](https://upgrade-platform.gitbook.io/upgrade-documentation/6.6/creating-an-experiment.md).
# Creating a New Experiment
Step-by-Step User Guide
## Introduction
The web portal of UpGrade provides an easy way to manage A/B testing in your educational software. This is a step-by-step guide to setting parameters and launching an experiment in the UpGrade UI. In this example, we will set up a **Simple Random** experiment with **Individual** unit of assignment that compares the effectiveness of two different versions of the same lesson: one concrete, and one abstract.
## Setting up a new experiment
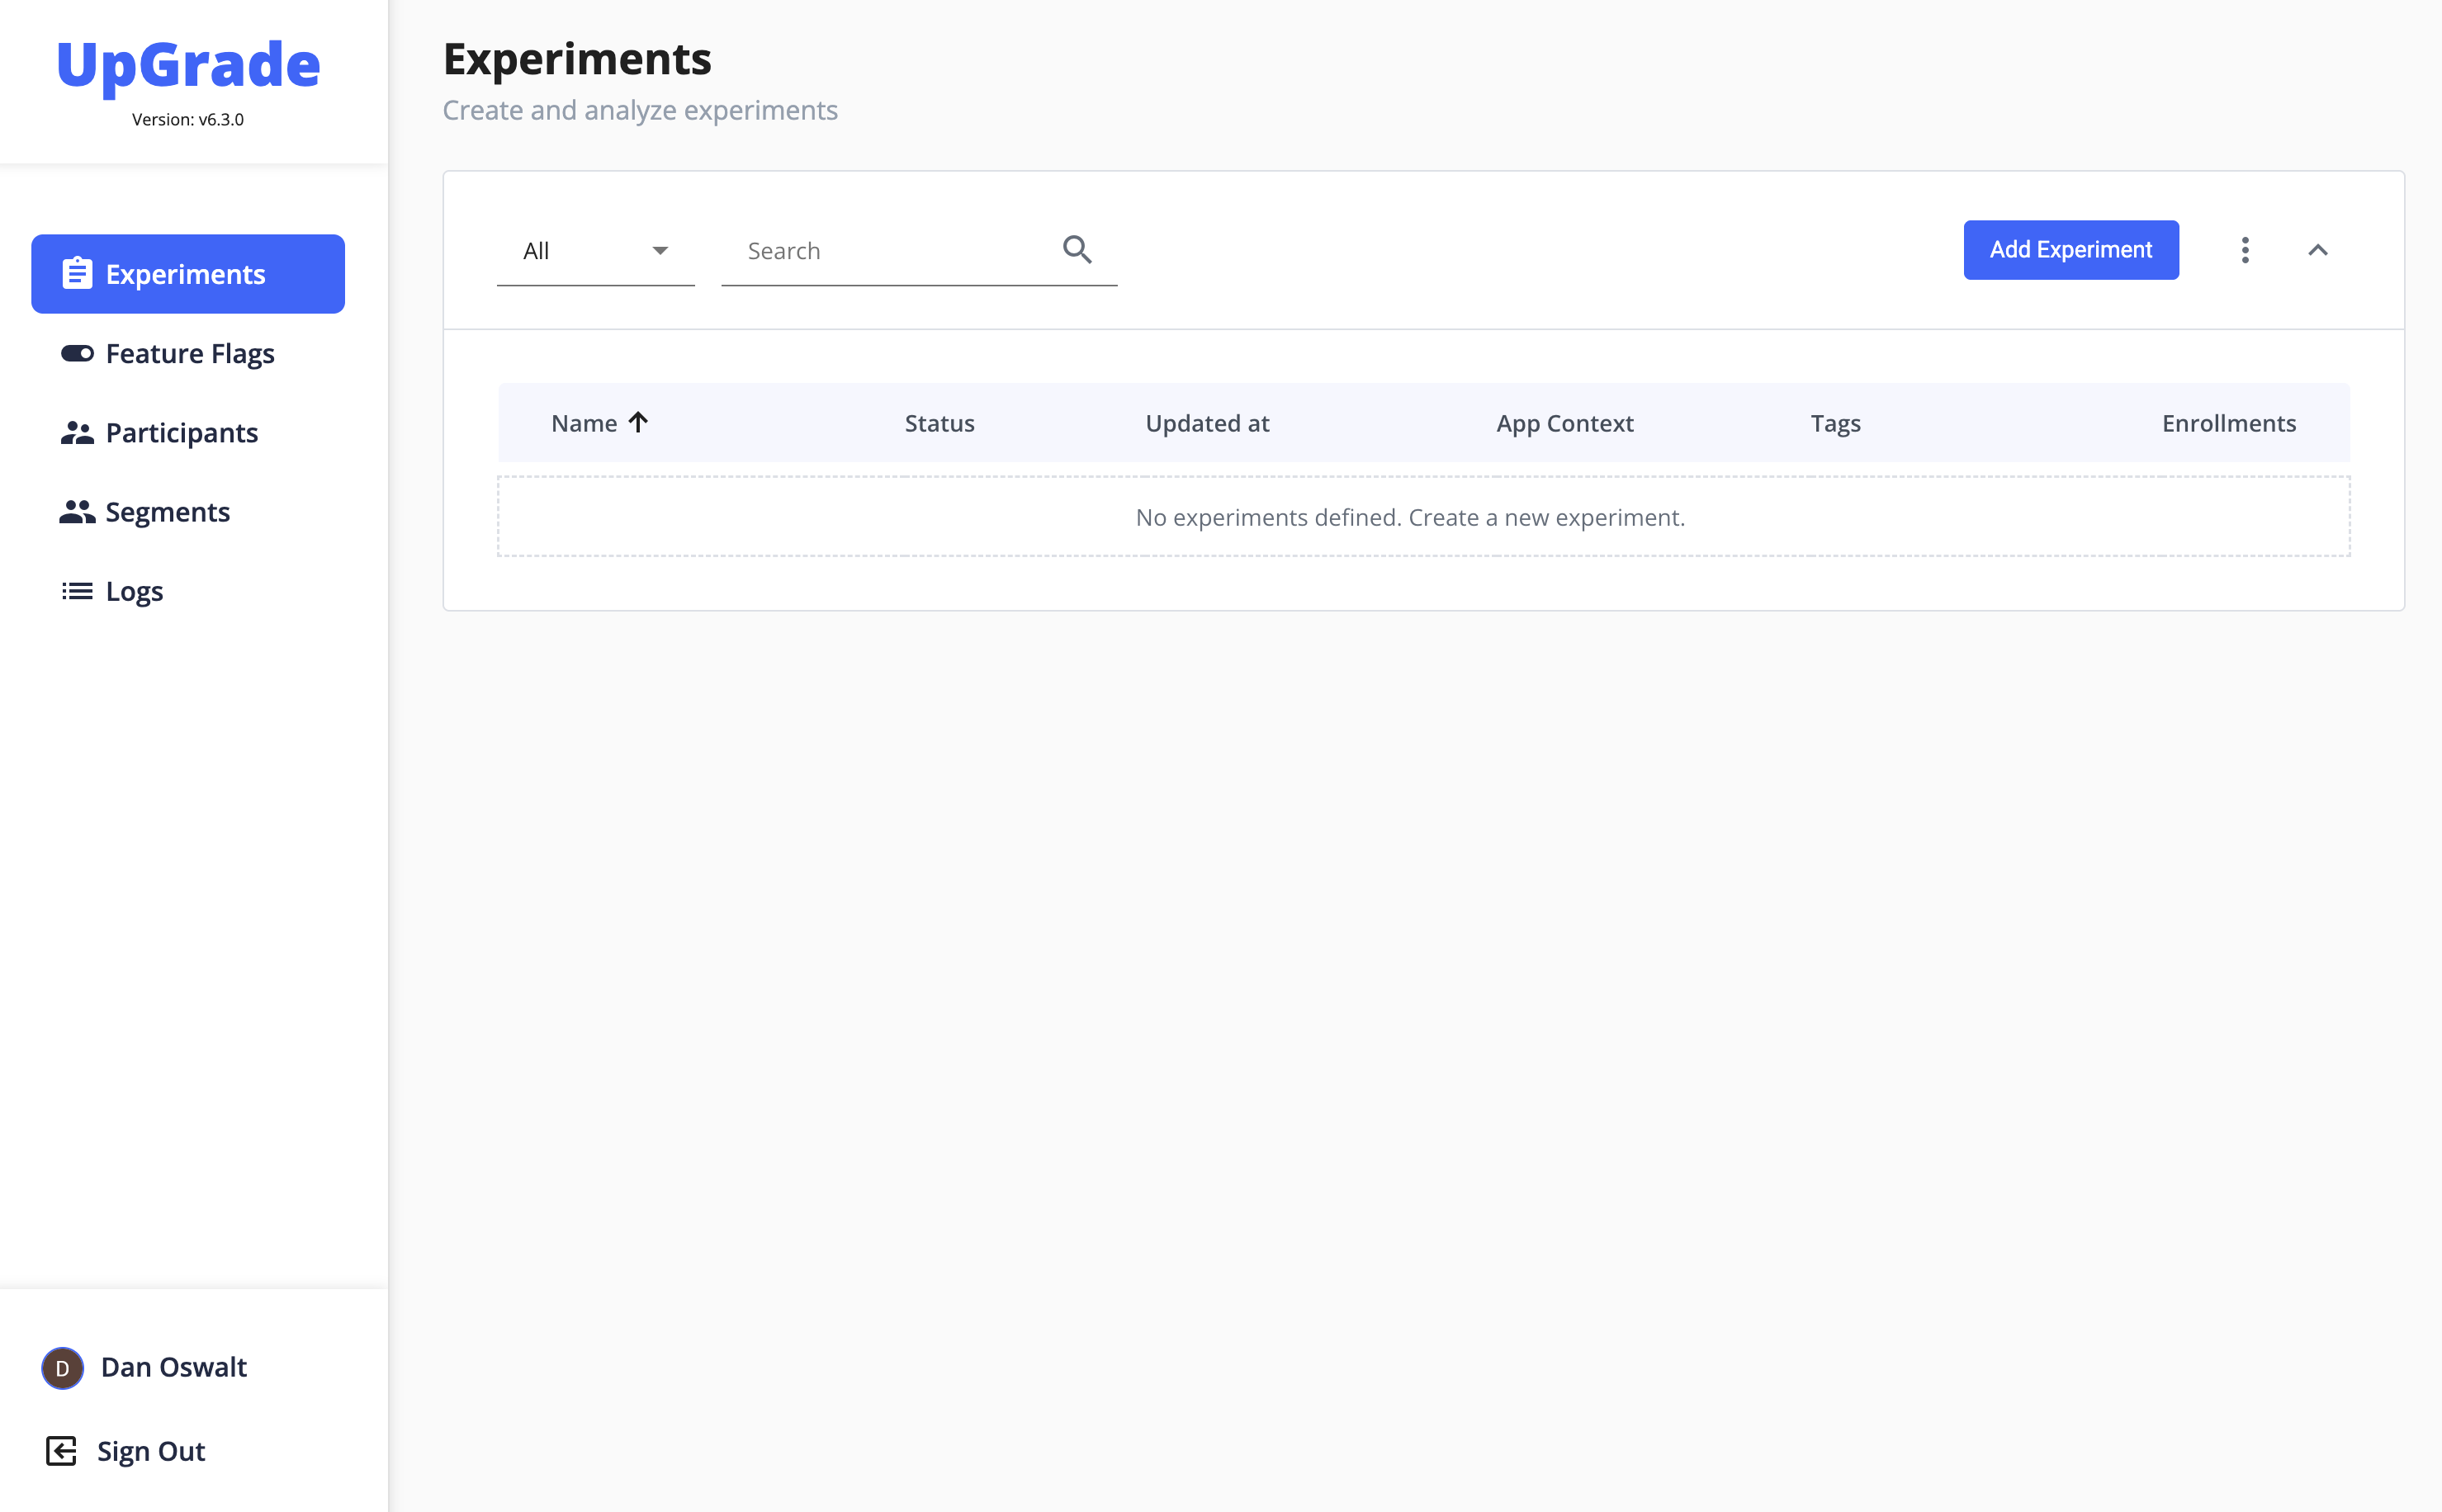
After UpGrade has been set up on your cloud infrastructure using the instructions in the Developer Guide, navigate to your instance of UpGrade. After logging in using your credentials, you should see the UpGrade home page.
If no experiments have been created yet, the experiment list will be empty, and you will see two options to create an experiment.
* **Import Experiment** allows you to upload a pre-existing JSON file containing the experiment design parameters, that might have been exported at an earlier point in time.
* **Add Experiment** starts the experiment creation wizard, where you can manually enter the experiment parameters.
Click on **Add Experiment** to start creating an experiment.
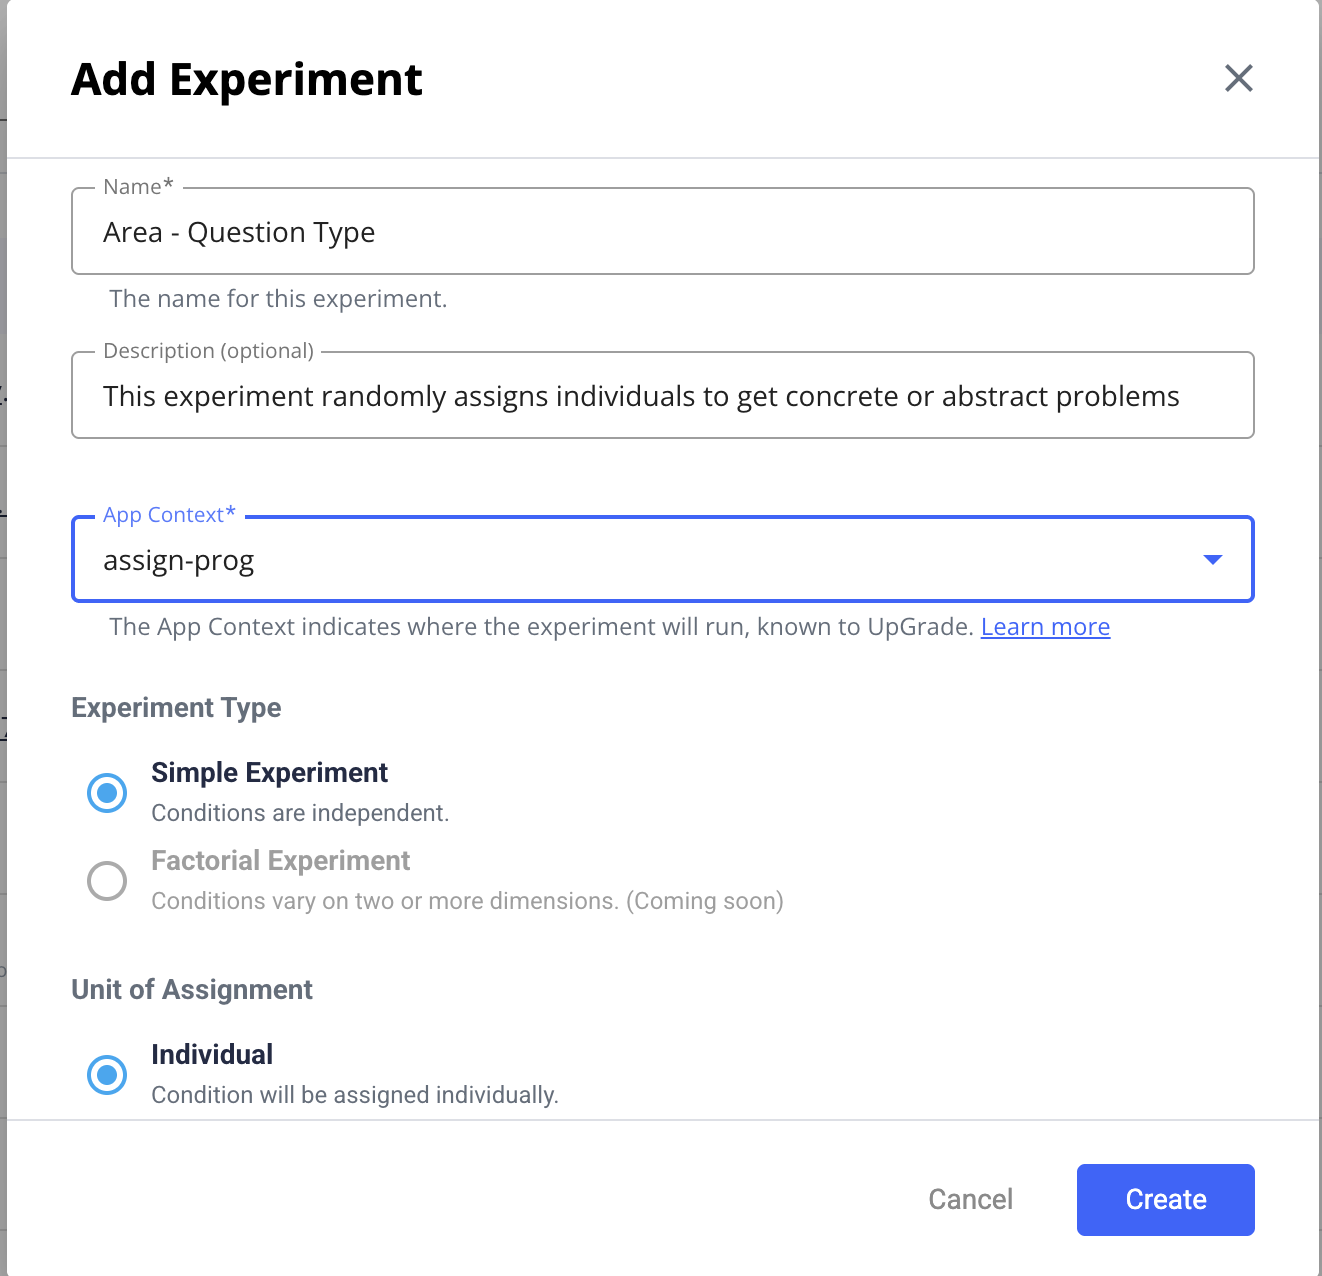
Start by entering a **Name** for the experiment and an optional **Description**.
The **App Context** is where the experiment will run. This is the name of the client application, which was set up in the Developer Guide.
**Experiment Type** allows you to choose between different experiment structures. Current supported types are Simple and Factorial.
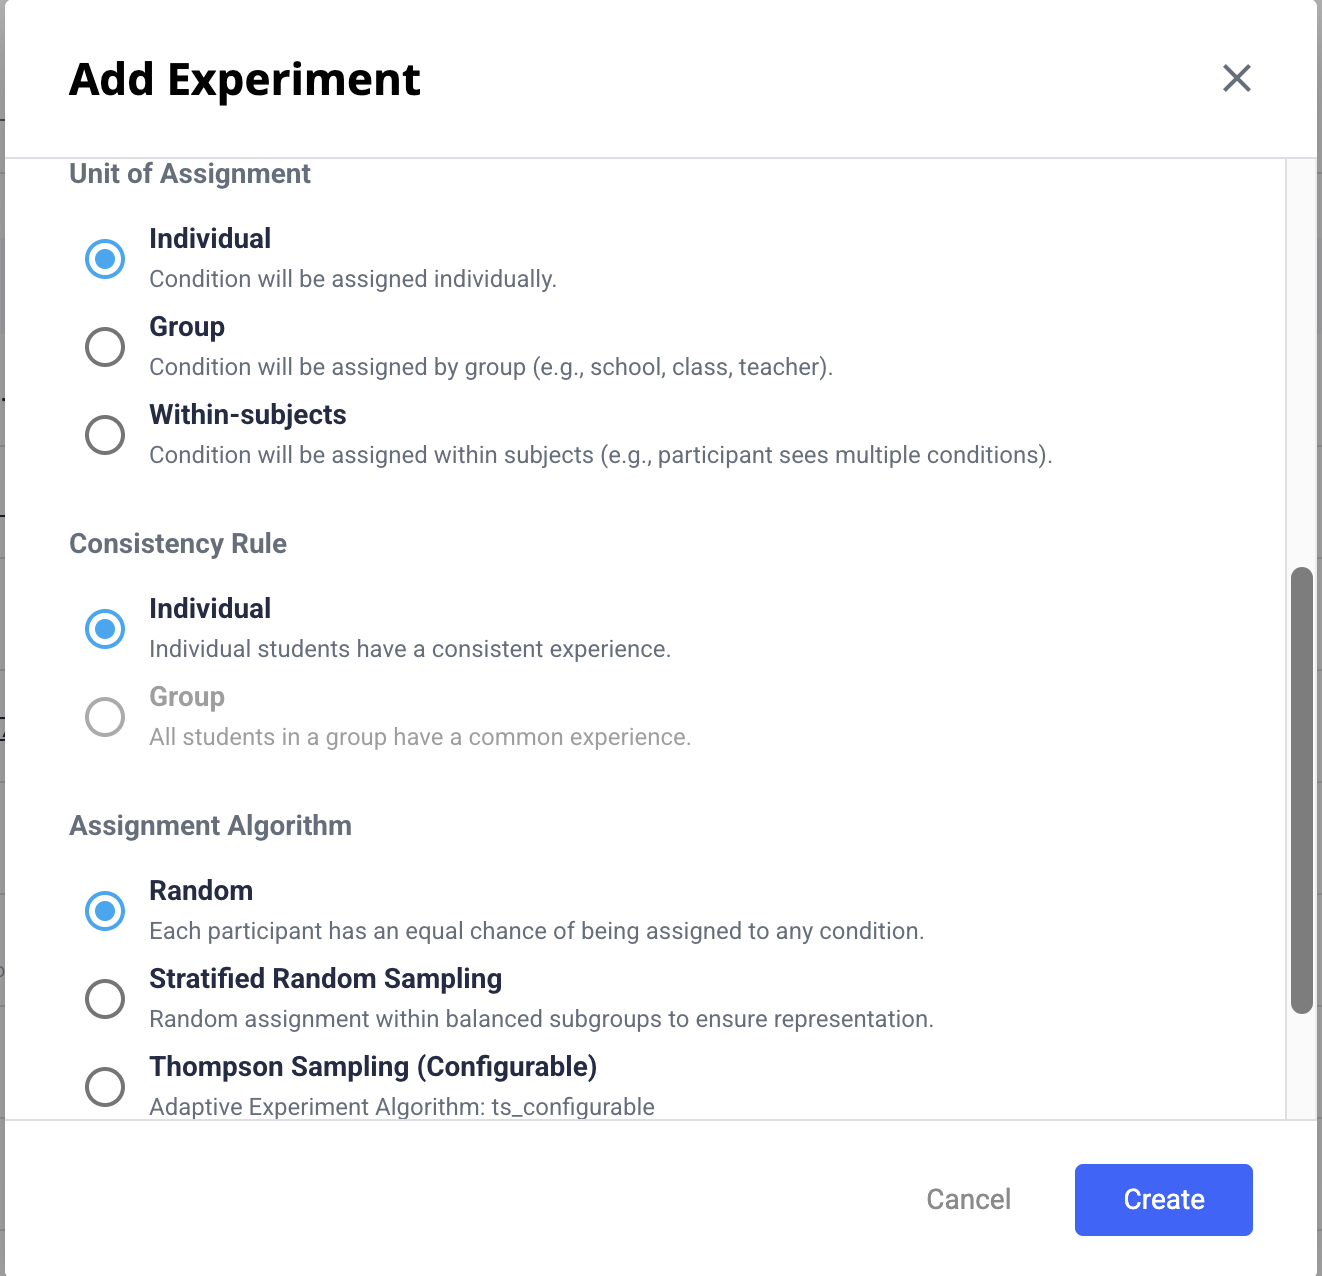
Next set the **Unit of Assignment**. UpGrade allows users to be randomly assigned to different conditions at the individual level, group level, or within-subjects. In individual random assignment, participants (such as students in the same class) can be assigned different conditions. In group random assignment, all participants within a group will receive the same condition assignment. If you select group you will be prompted to select a group type. Custom group types are also allowed. For within-subjects experiments, each time a participant reaches a decision point, they will receive a new condition.
The **Consistency Rule** of the experiment is used to control coherence of learning experiences. For instance, to ensure that either everyone in the group gets the same condition assignment *or* they all remain excluded from the experiment. Read more about how this parameter works under the Creating an Experiment tab in the menu.
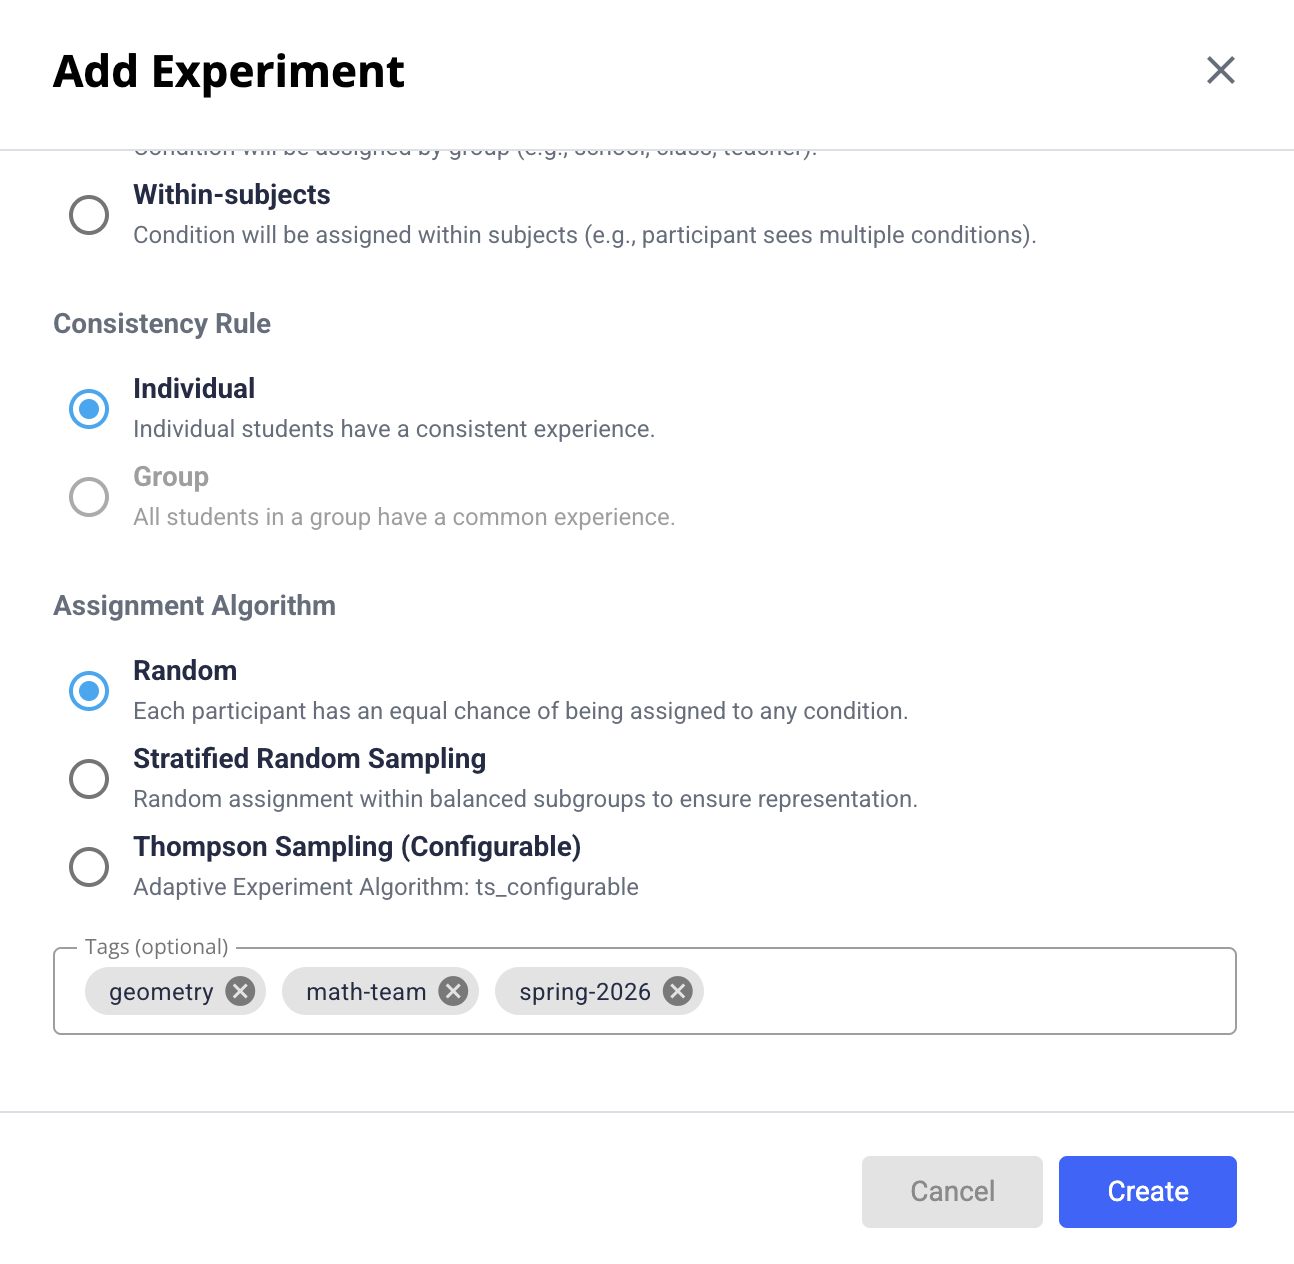
Finally, **Assignment Algorithm** allows you to choose between simple weighted Random (with equally or unequally weighted conditions), Stratified Random Sampling (where subgroup characteristics are uploaded separately and randomization takes into consideration these strata), and Thompson Sampling, an adaptive algorithm that dynamically adjusts condition weights based on a reward metric. More about the algorithms and how they work can be found under the Creating an Experiment tab in the menu.
You can also optionally add tags to the experiment.
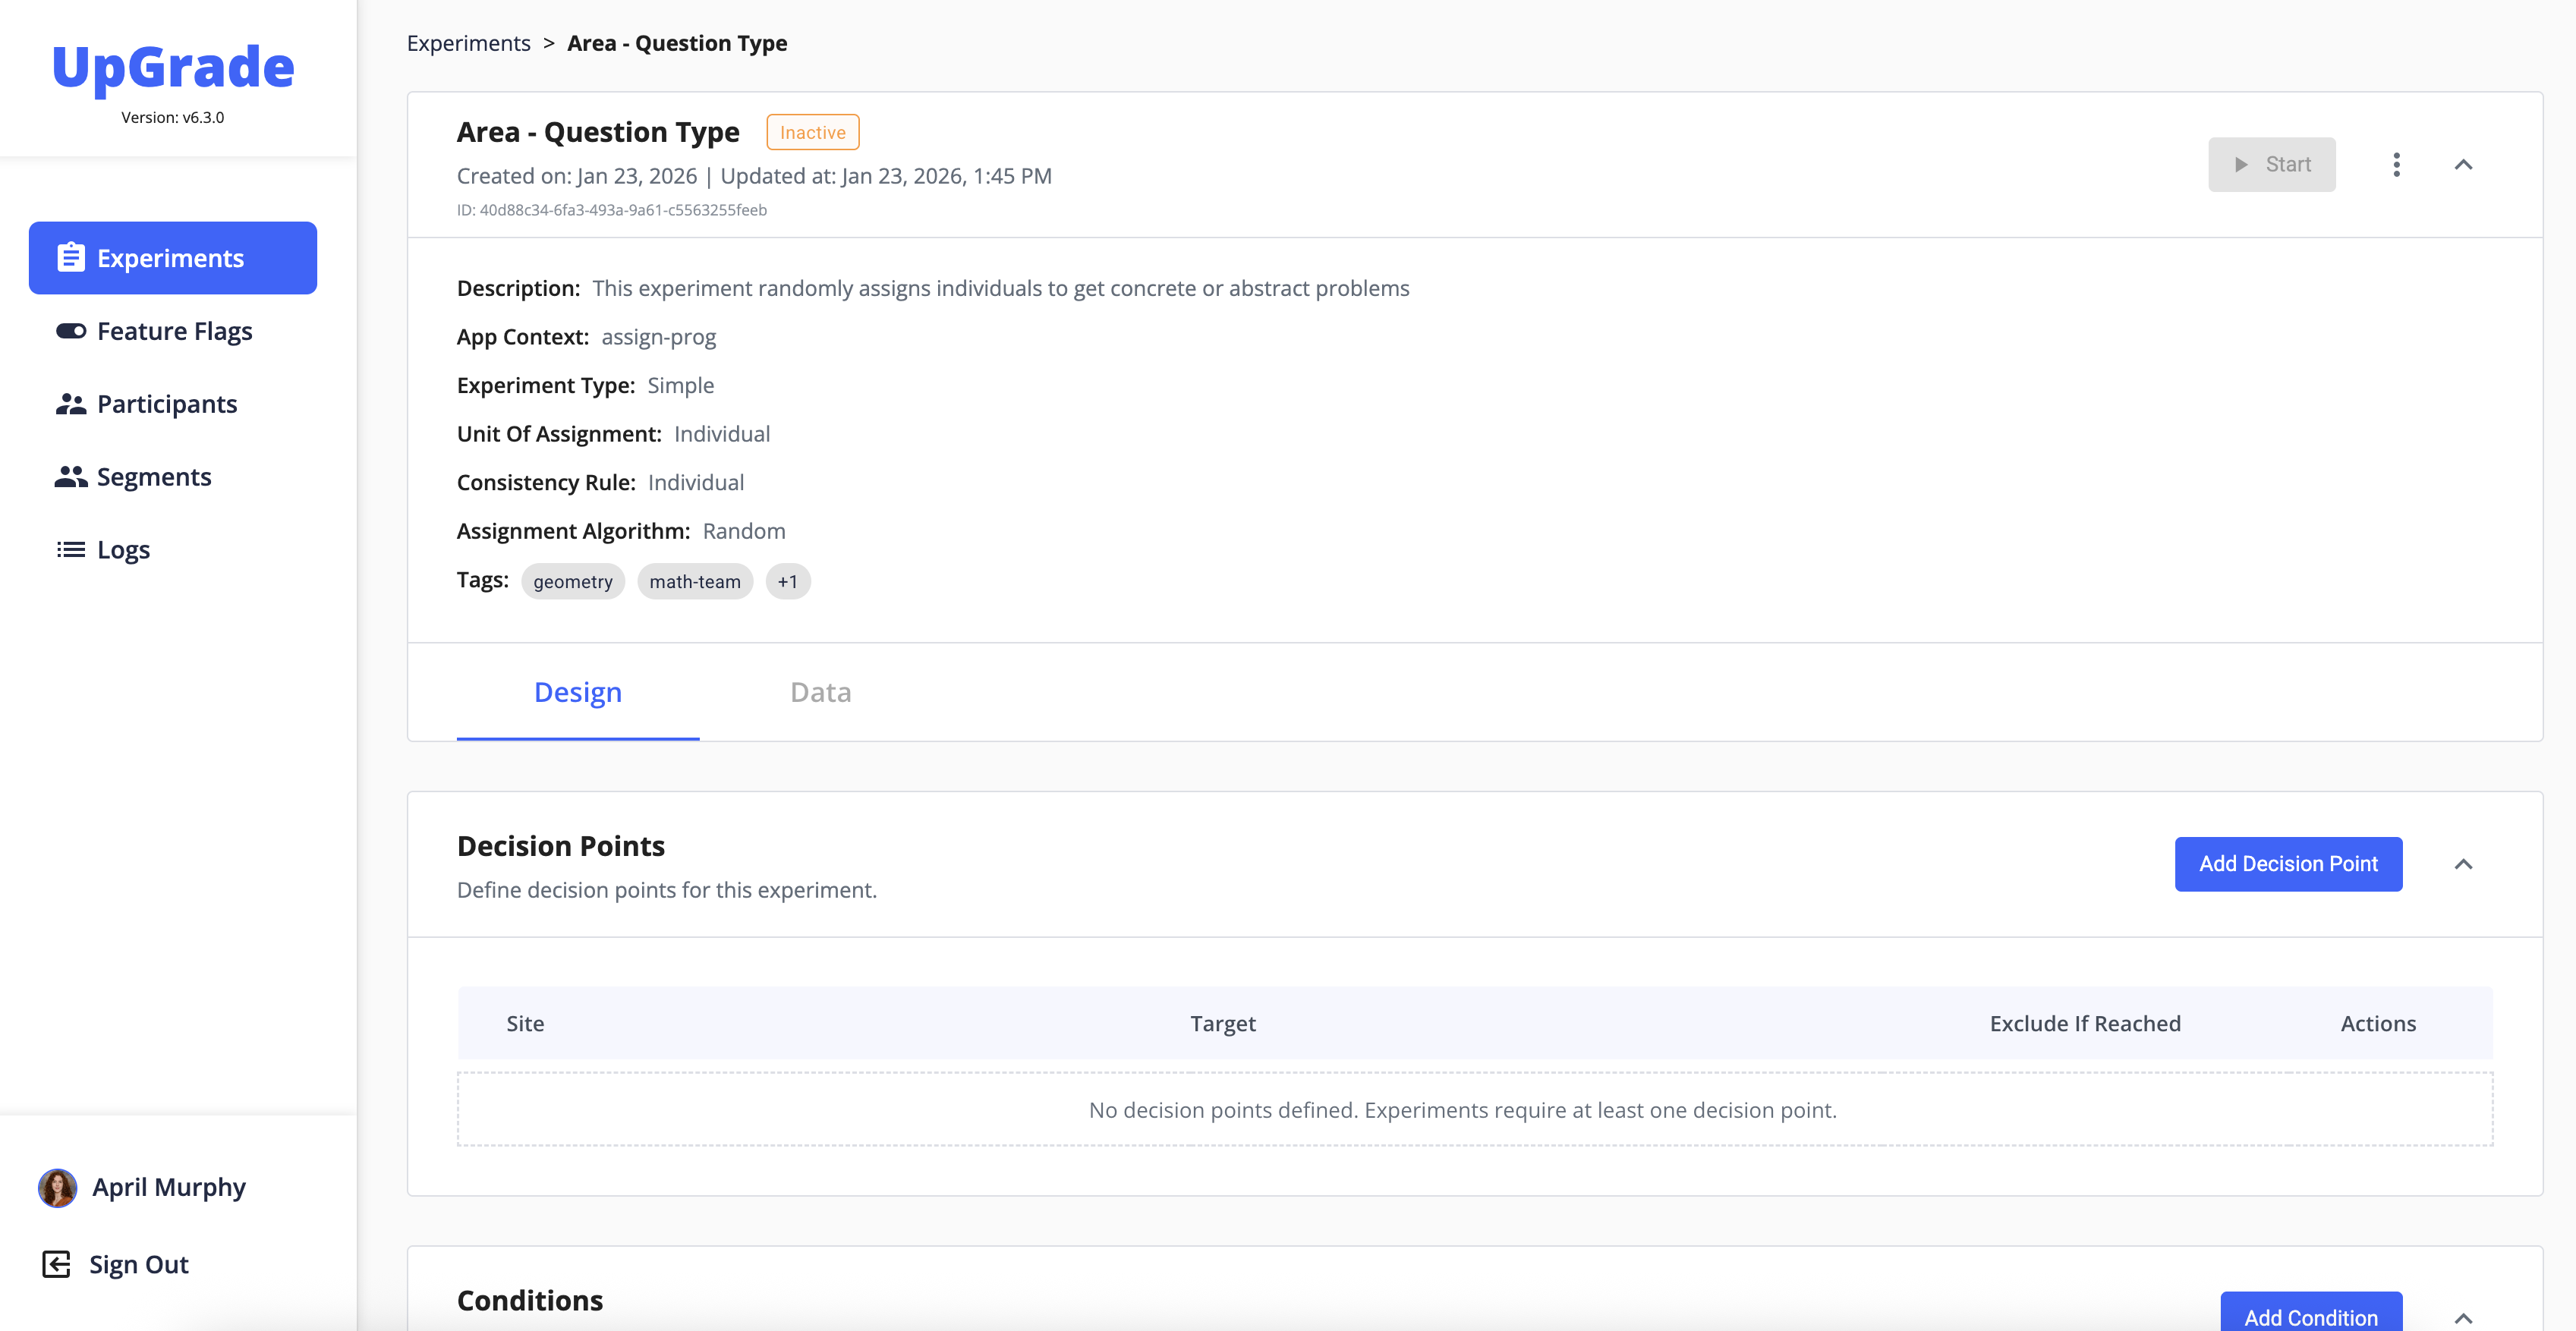
After entering the parameters, click **Create**. The initial parameters are now set, and you will be taken to the experiment detail page.
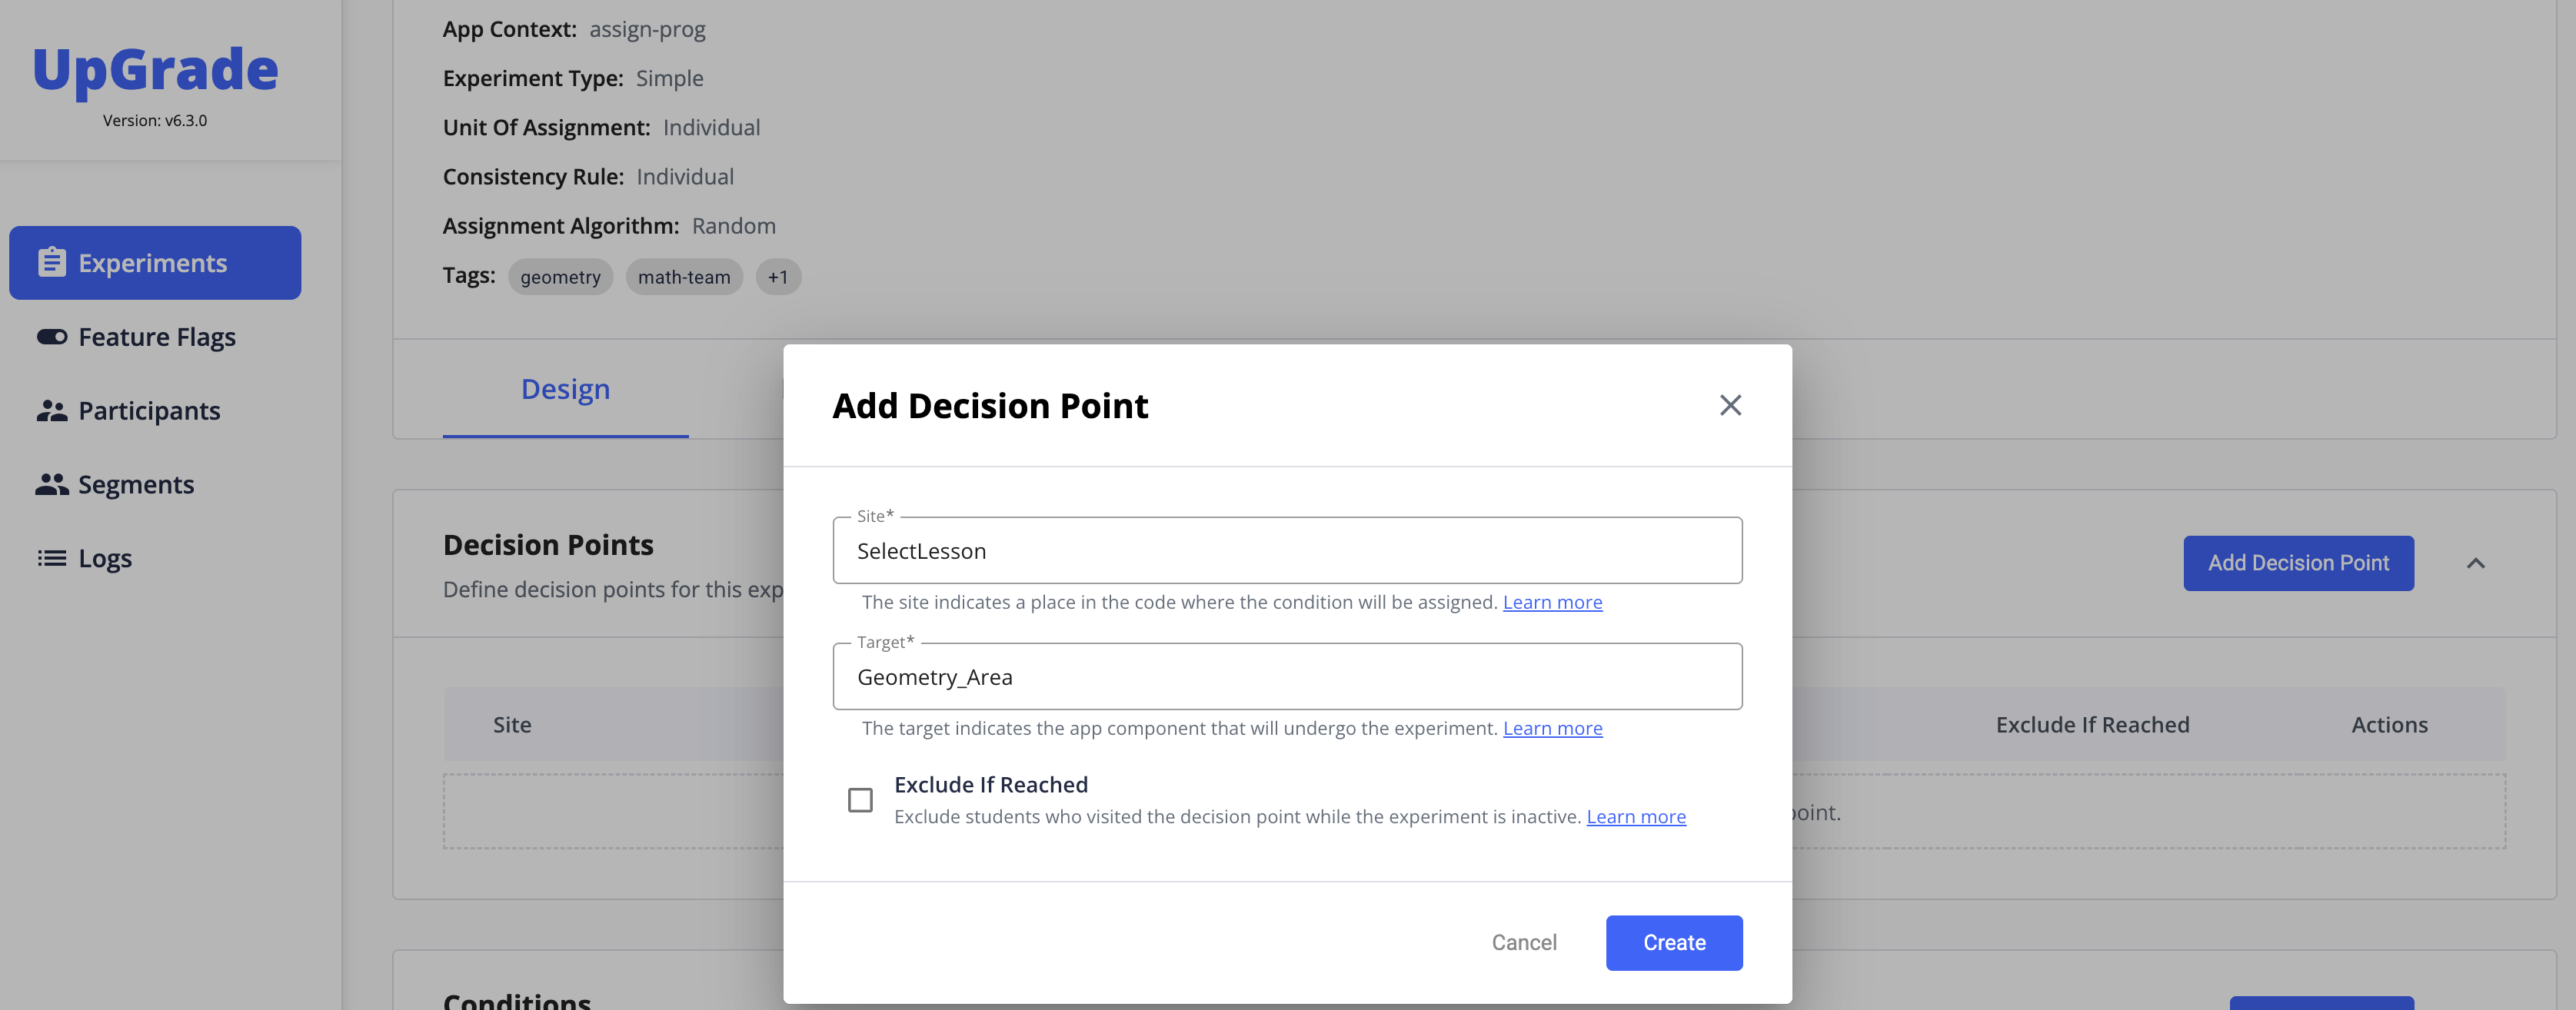
Every experiment requires at least one **Decision Point**. Each decision point is represented by its corresponding **Site** and **Target**. Decision points are the place or function in the client code where the conditional code execution happens--aka, where the UpGrade API call to `markExperimentPoint` occurs. An example of a **Site** could be a function called `SelectLesson`, and the **Target** could be the specific lesson `Geometry_Area`. From the table in the Experiment Detail page, select Add Decision Point. In the corresponding modal, enter the information for your decision point.
An optional parameter within the decision point modal is **Exclude if Reached**, which excludes any users from the experiment if they reached the decision point during the period prior to the experiment creation, or when the experiment has been defined but is in an inactive state. Note that for this parameter to work, the `markExperimentPoint` code needs to exist at the decision point in the client application. One possible use case for this parameter could be if the experimenter expects the users to reach the decision point multiple times in their experience with the client app, and only wants users who never reached the decision point prior to experiment launch to be randomly assigned a condition.
After adding the decision point and optionally selecting **Exclude if Reached**, click **Create**.
Your decision point will now appear in the table on the experiment page. You may now optionally add more decision points, if desired.
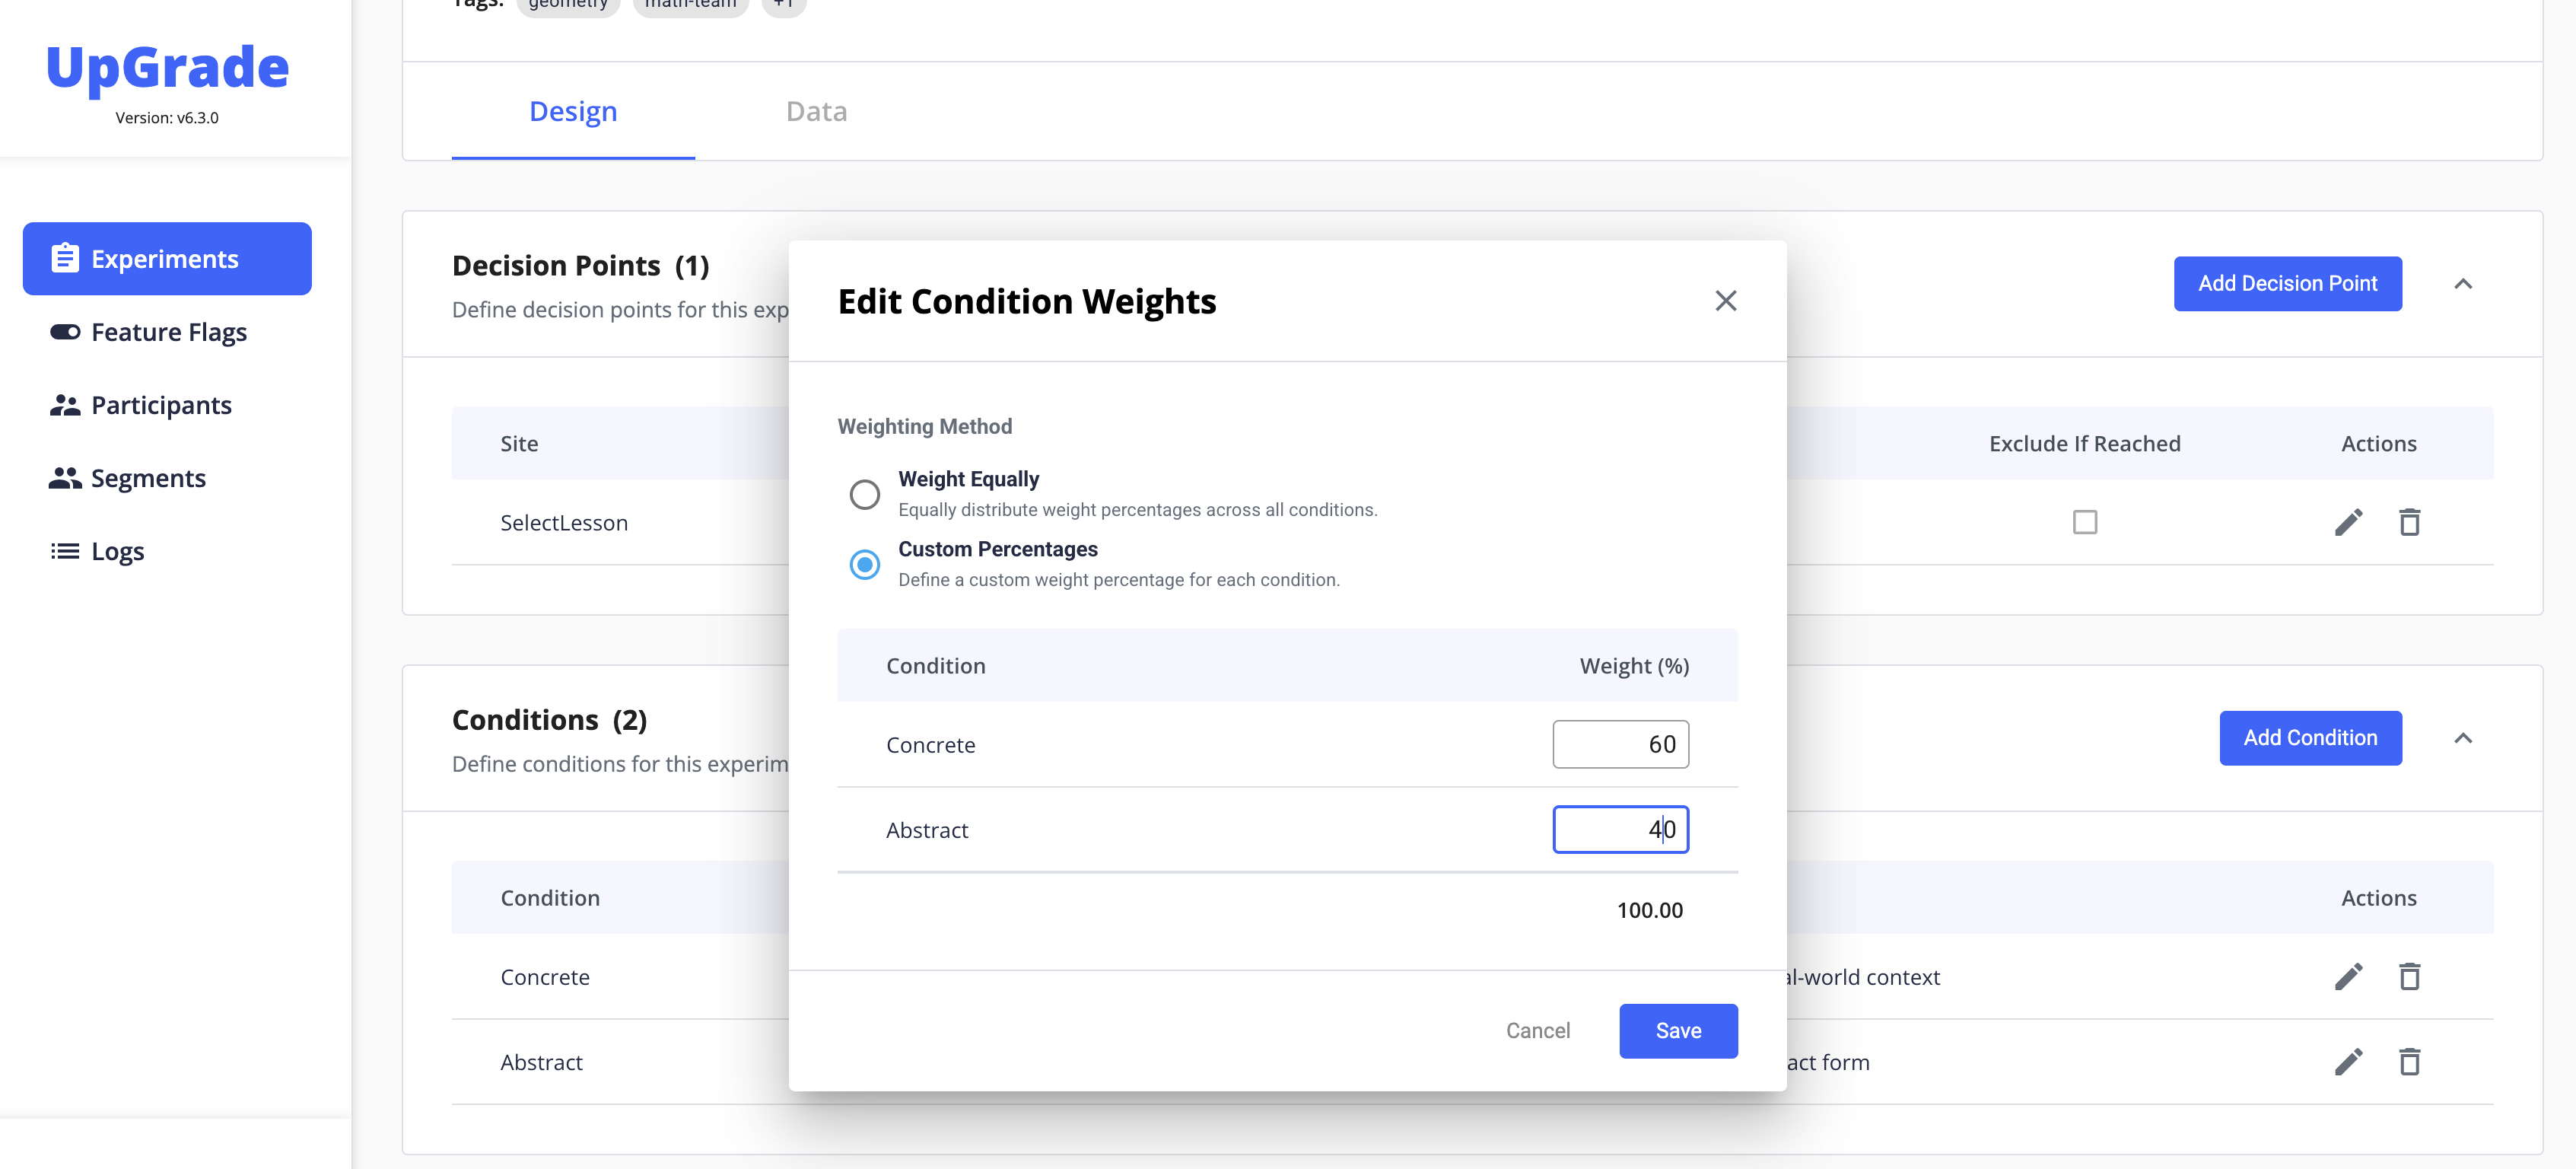
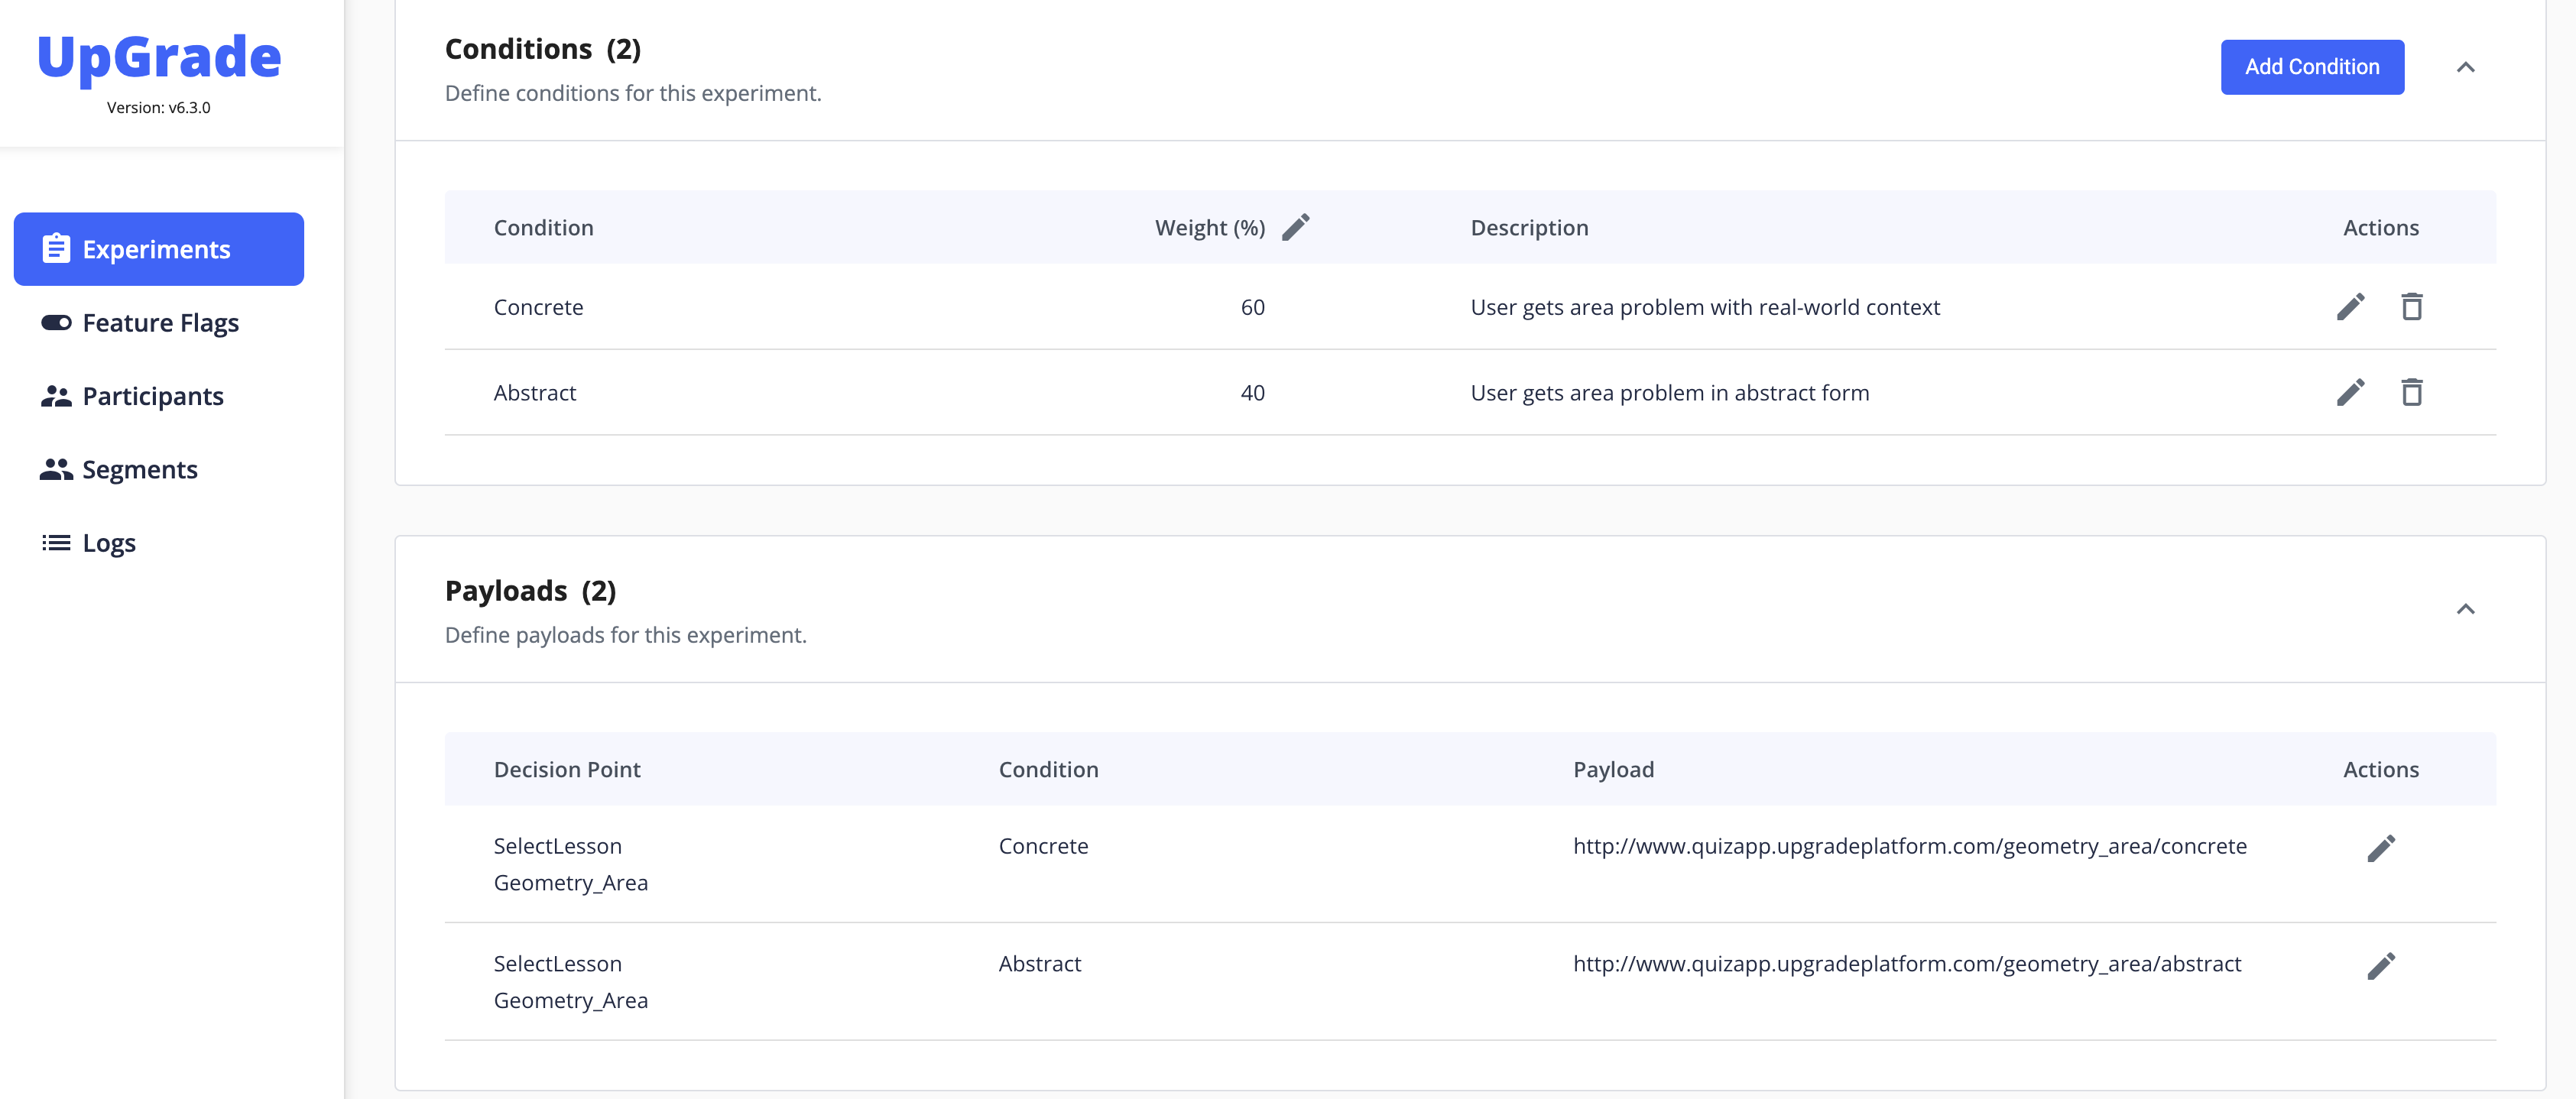
Next, add **Conditions** and **Payloads**, both of which represent the different experiences the experiment will randomly assign to the users. The difference between Condition and Payload is while Condition is a required label for the experimental variables that are manipulated in the experiment, Payload refers to the actual string value associated with the Condition that is passed to the decision point. A Payload can have the same string value as its associated Condition, but can also contain more complex information, such as a URL or json object. Conditions can be equally or unequally weighted.
The default Payload will be same as the condition name, but this can be edited to reflect the appropriate value.
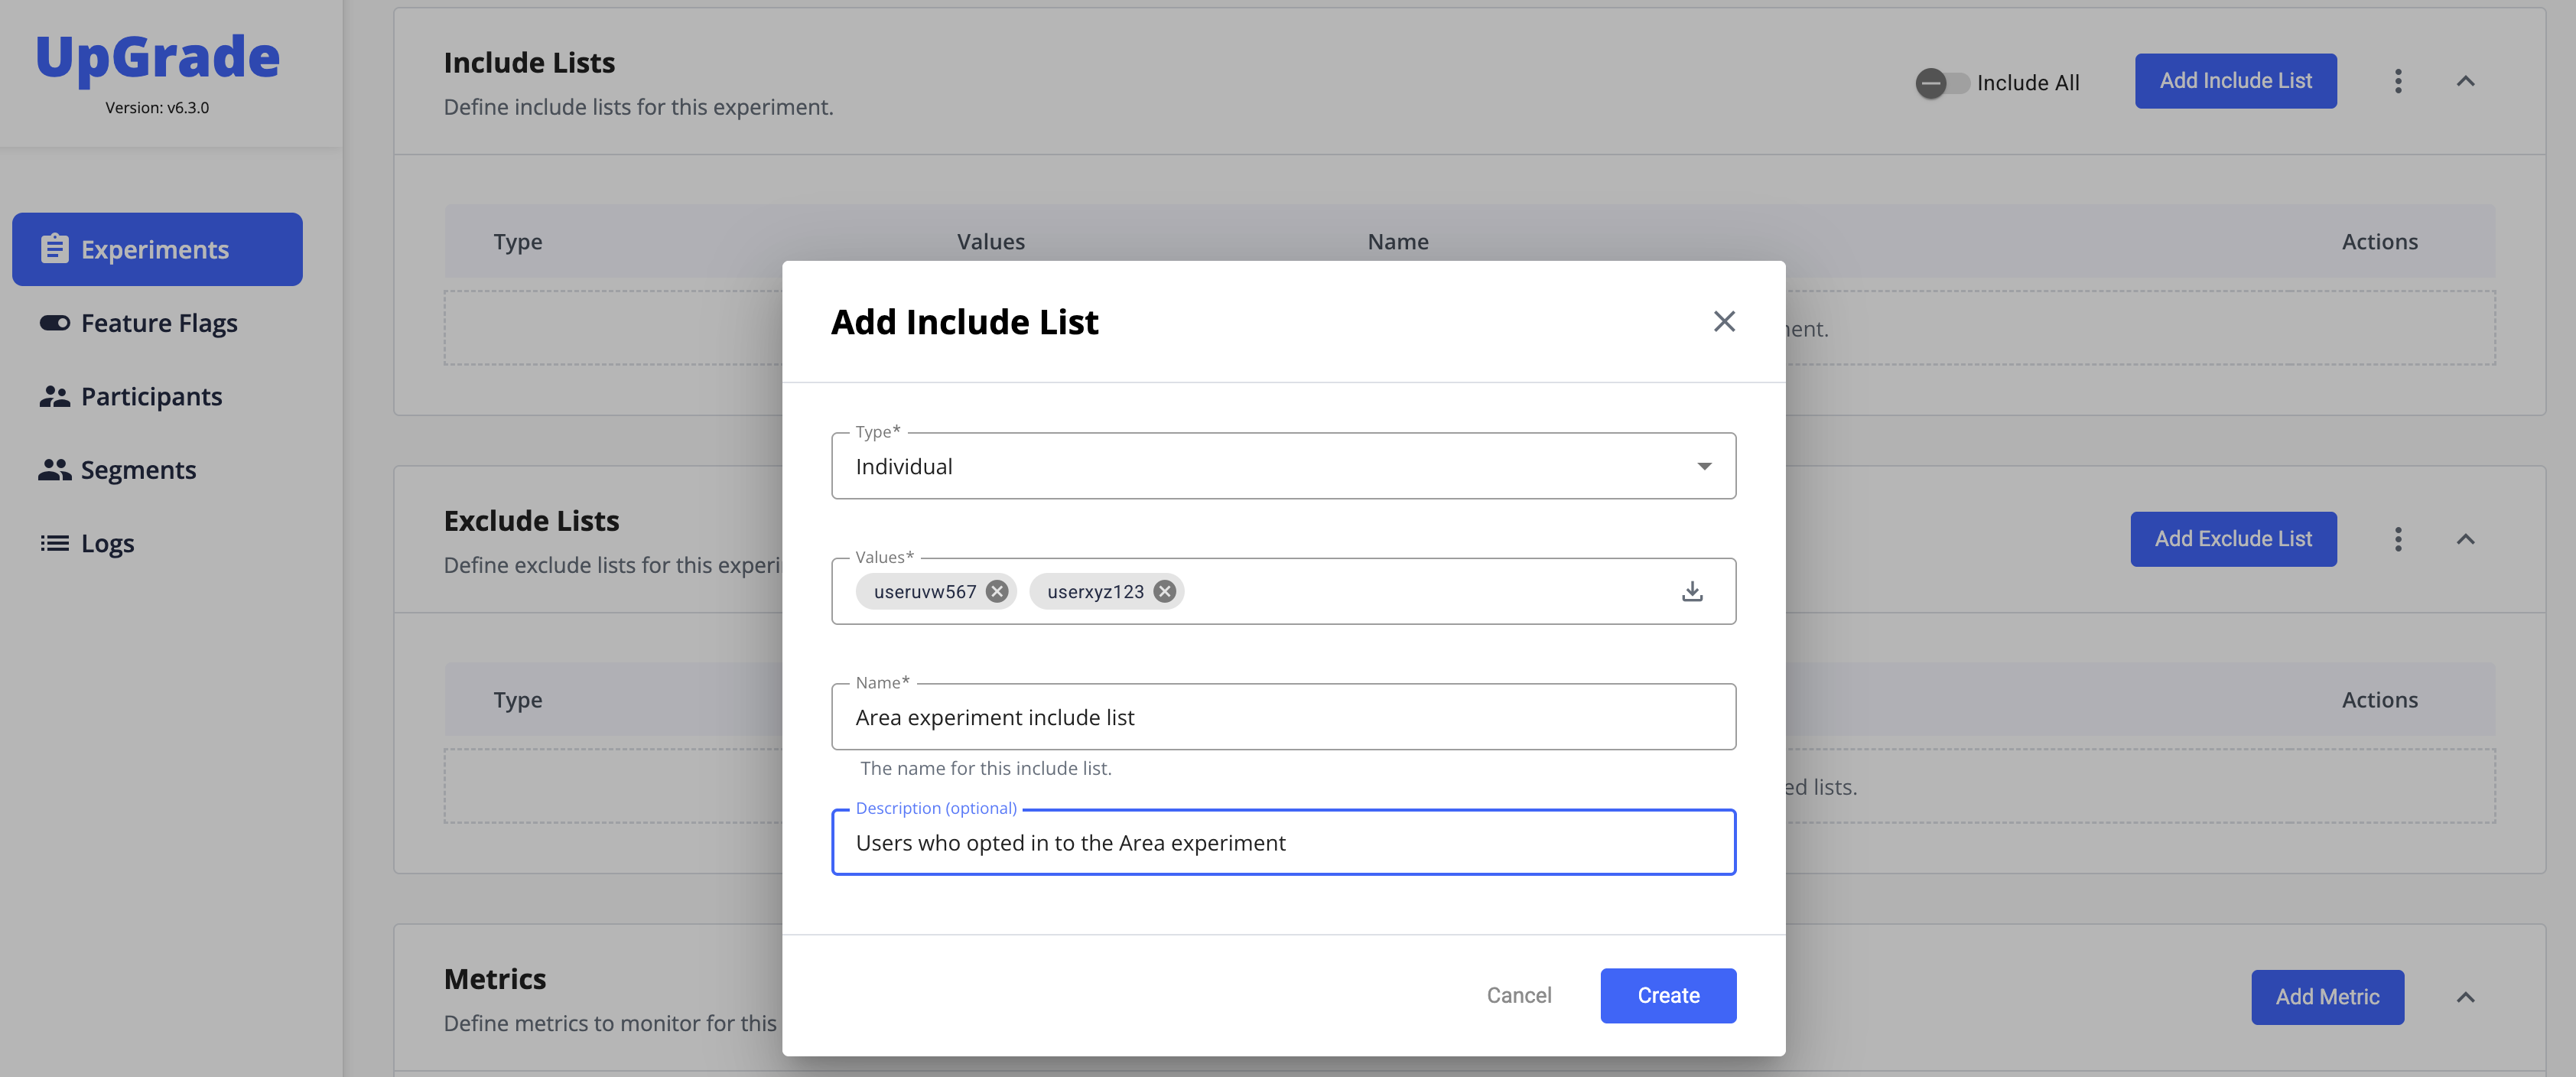
The process of specifying **Include** and **Exclude** lists is the same. In each type of list, you can add multiple Individuals or Groups (based on Group Type), or a singular Segment that has been previously created. Add additional lists to create combinations of ID types, such as including or excluding both Individual IDs and Group IDs, or multiple Segments.
The experiment is now ready to start. Start the experiment by pressing the blue **Start** button on the top right of the page.
Required parameters: Any experiment that is missing Decision Points, Conditions, or Include Lists will not be able to start--experiments are required to have at least one of these parameters. If any required parameters are missing, the Start button will be greyed out. Exclude lists and Metrics are not required for the experiment to start.
See the menu item on **Metrics** for detailed information on how to define metrics in an experiment.