# Creating a Feature Flag
### Overview
Feature Flags allow you to control the availability of features to specific groups or segments of users in UpGrade. This guide will walk you through the steps to create and enable a simple feature flag in the UpGrade UI.
### Steps to Create a Feature Flag
#### Step 1: Navigate to the Feature Flags Root Page
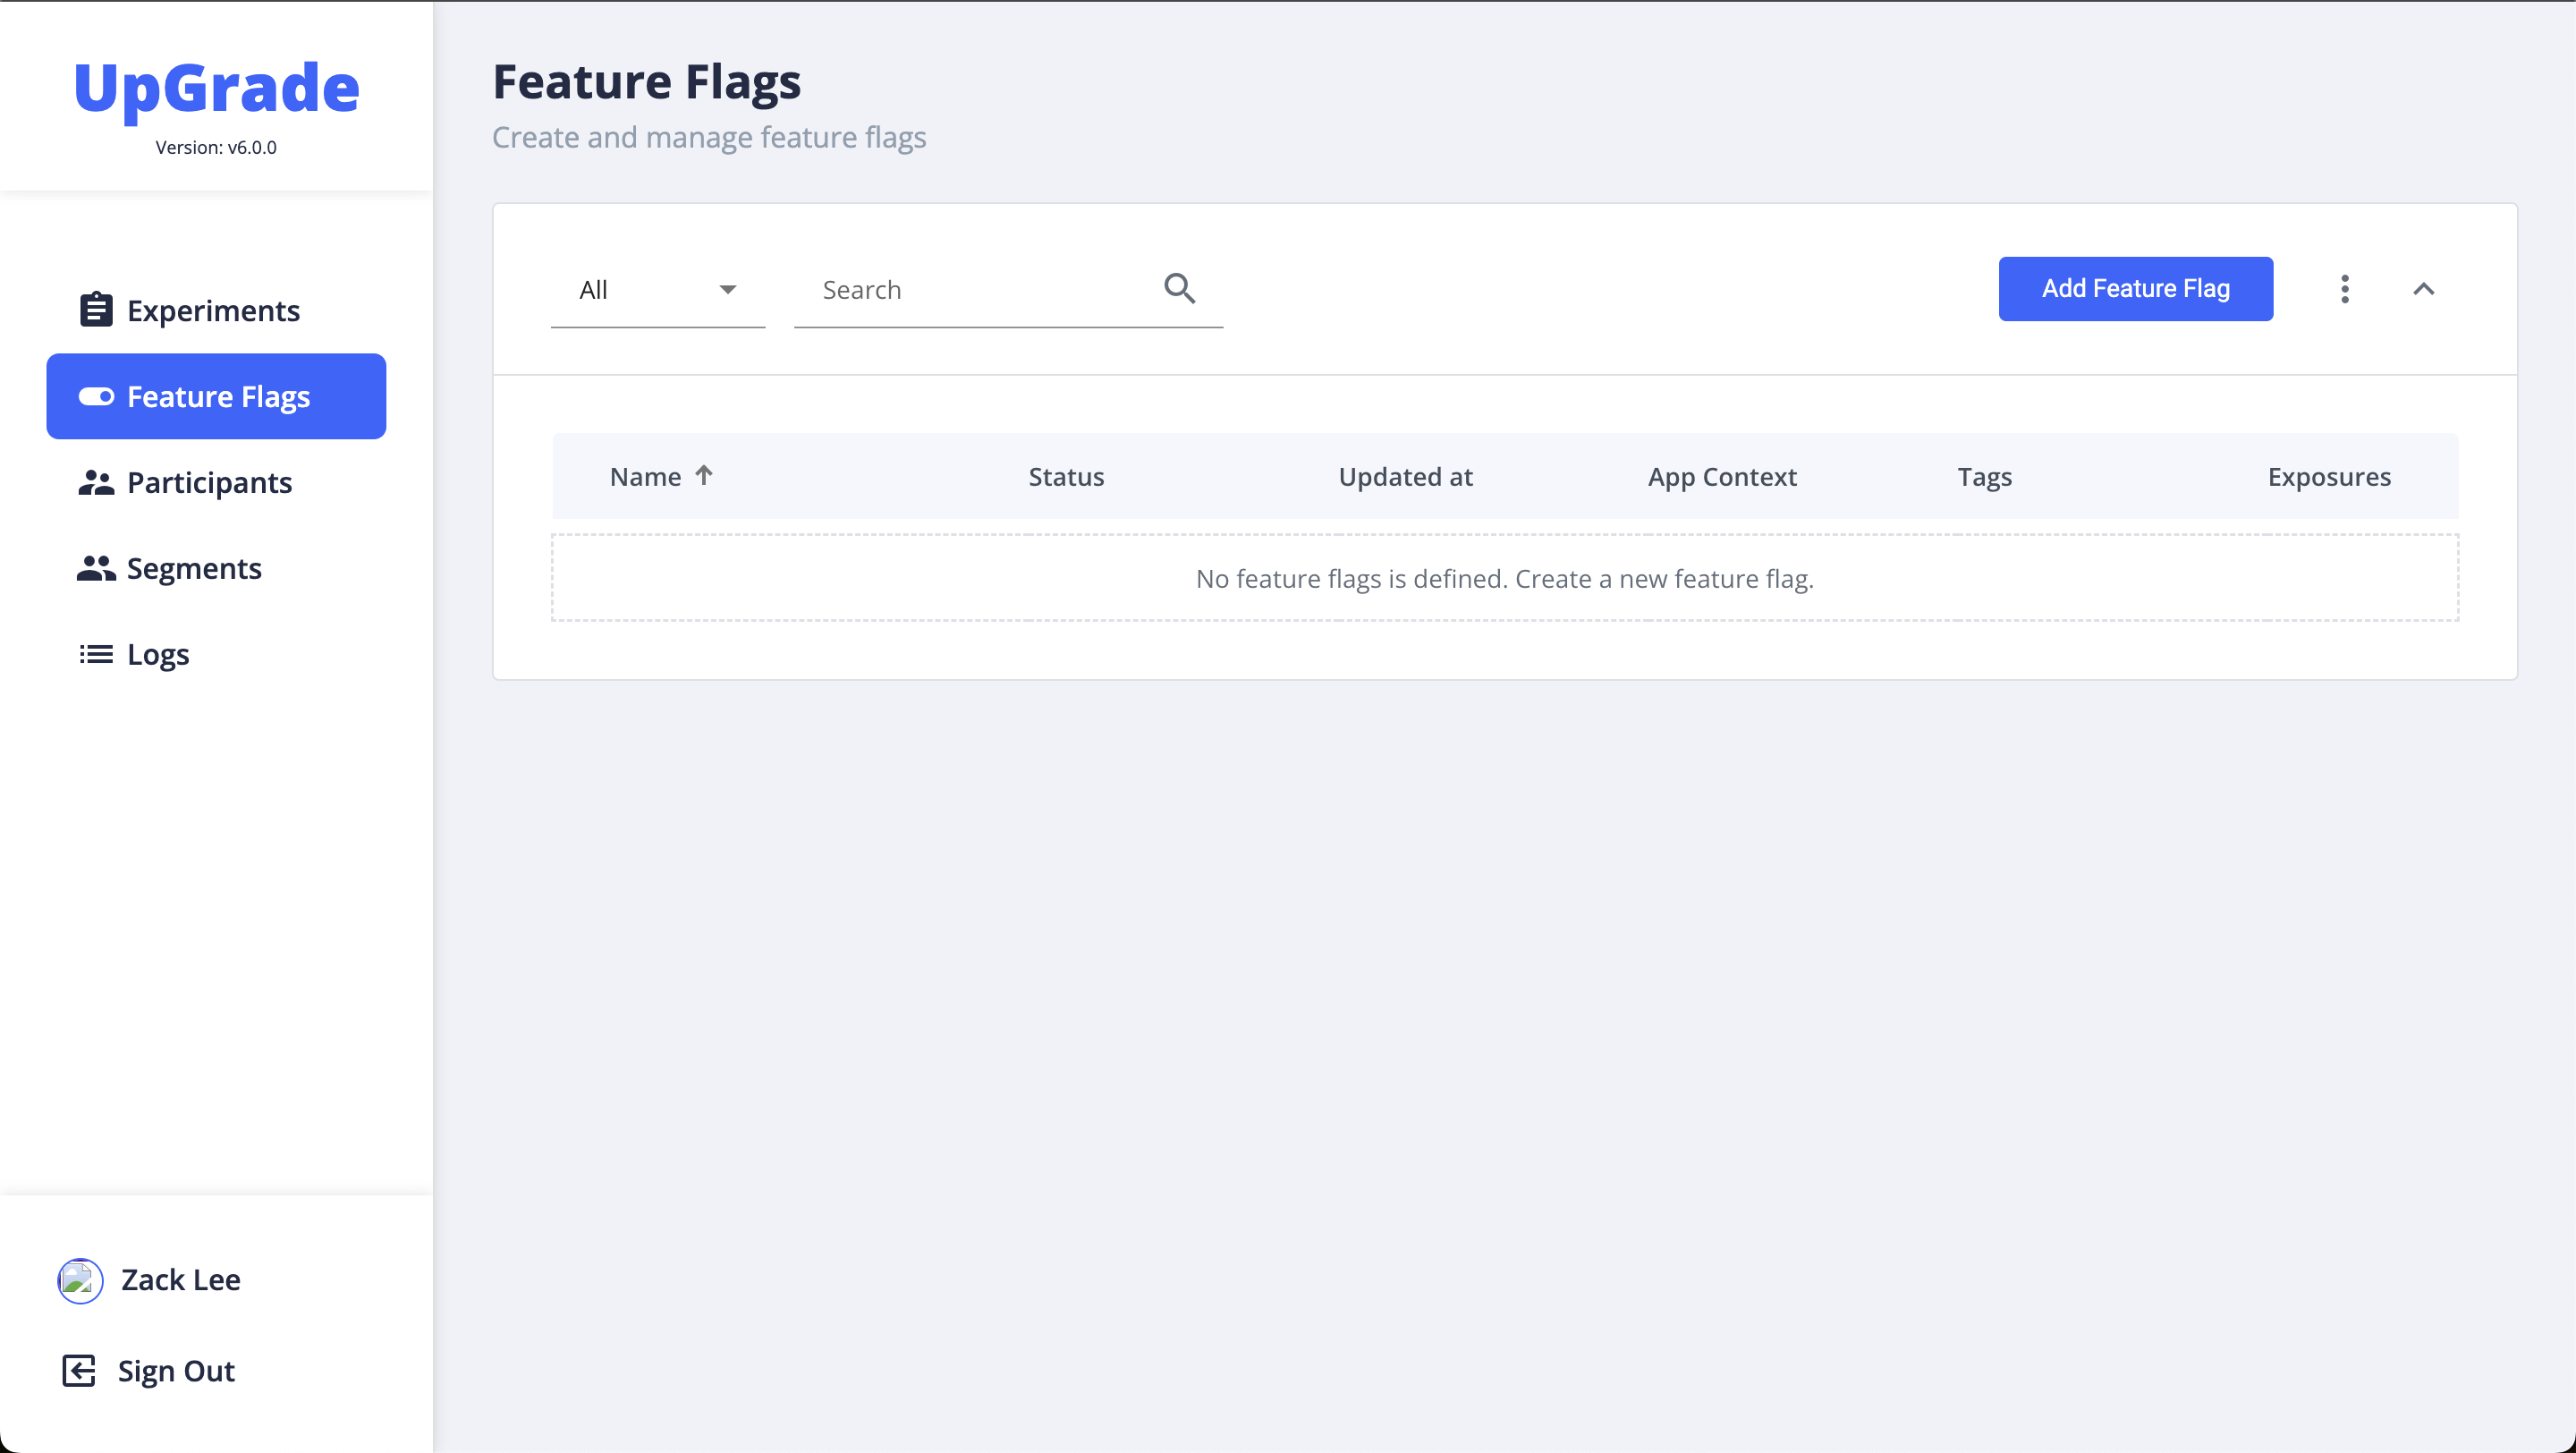
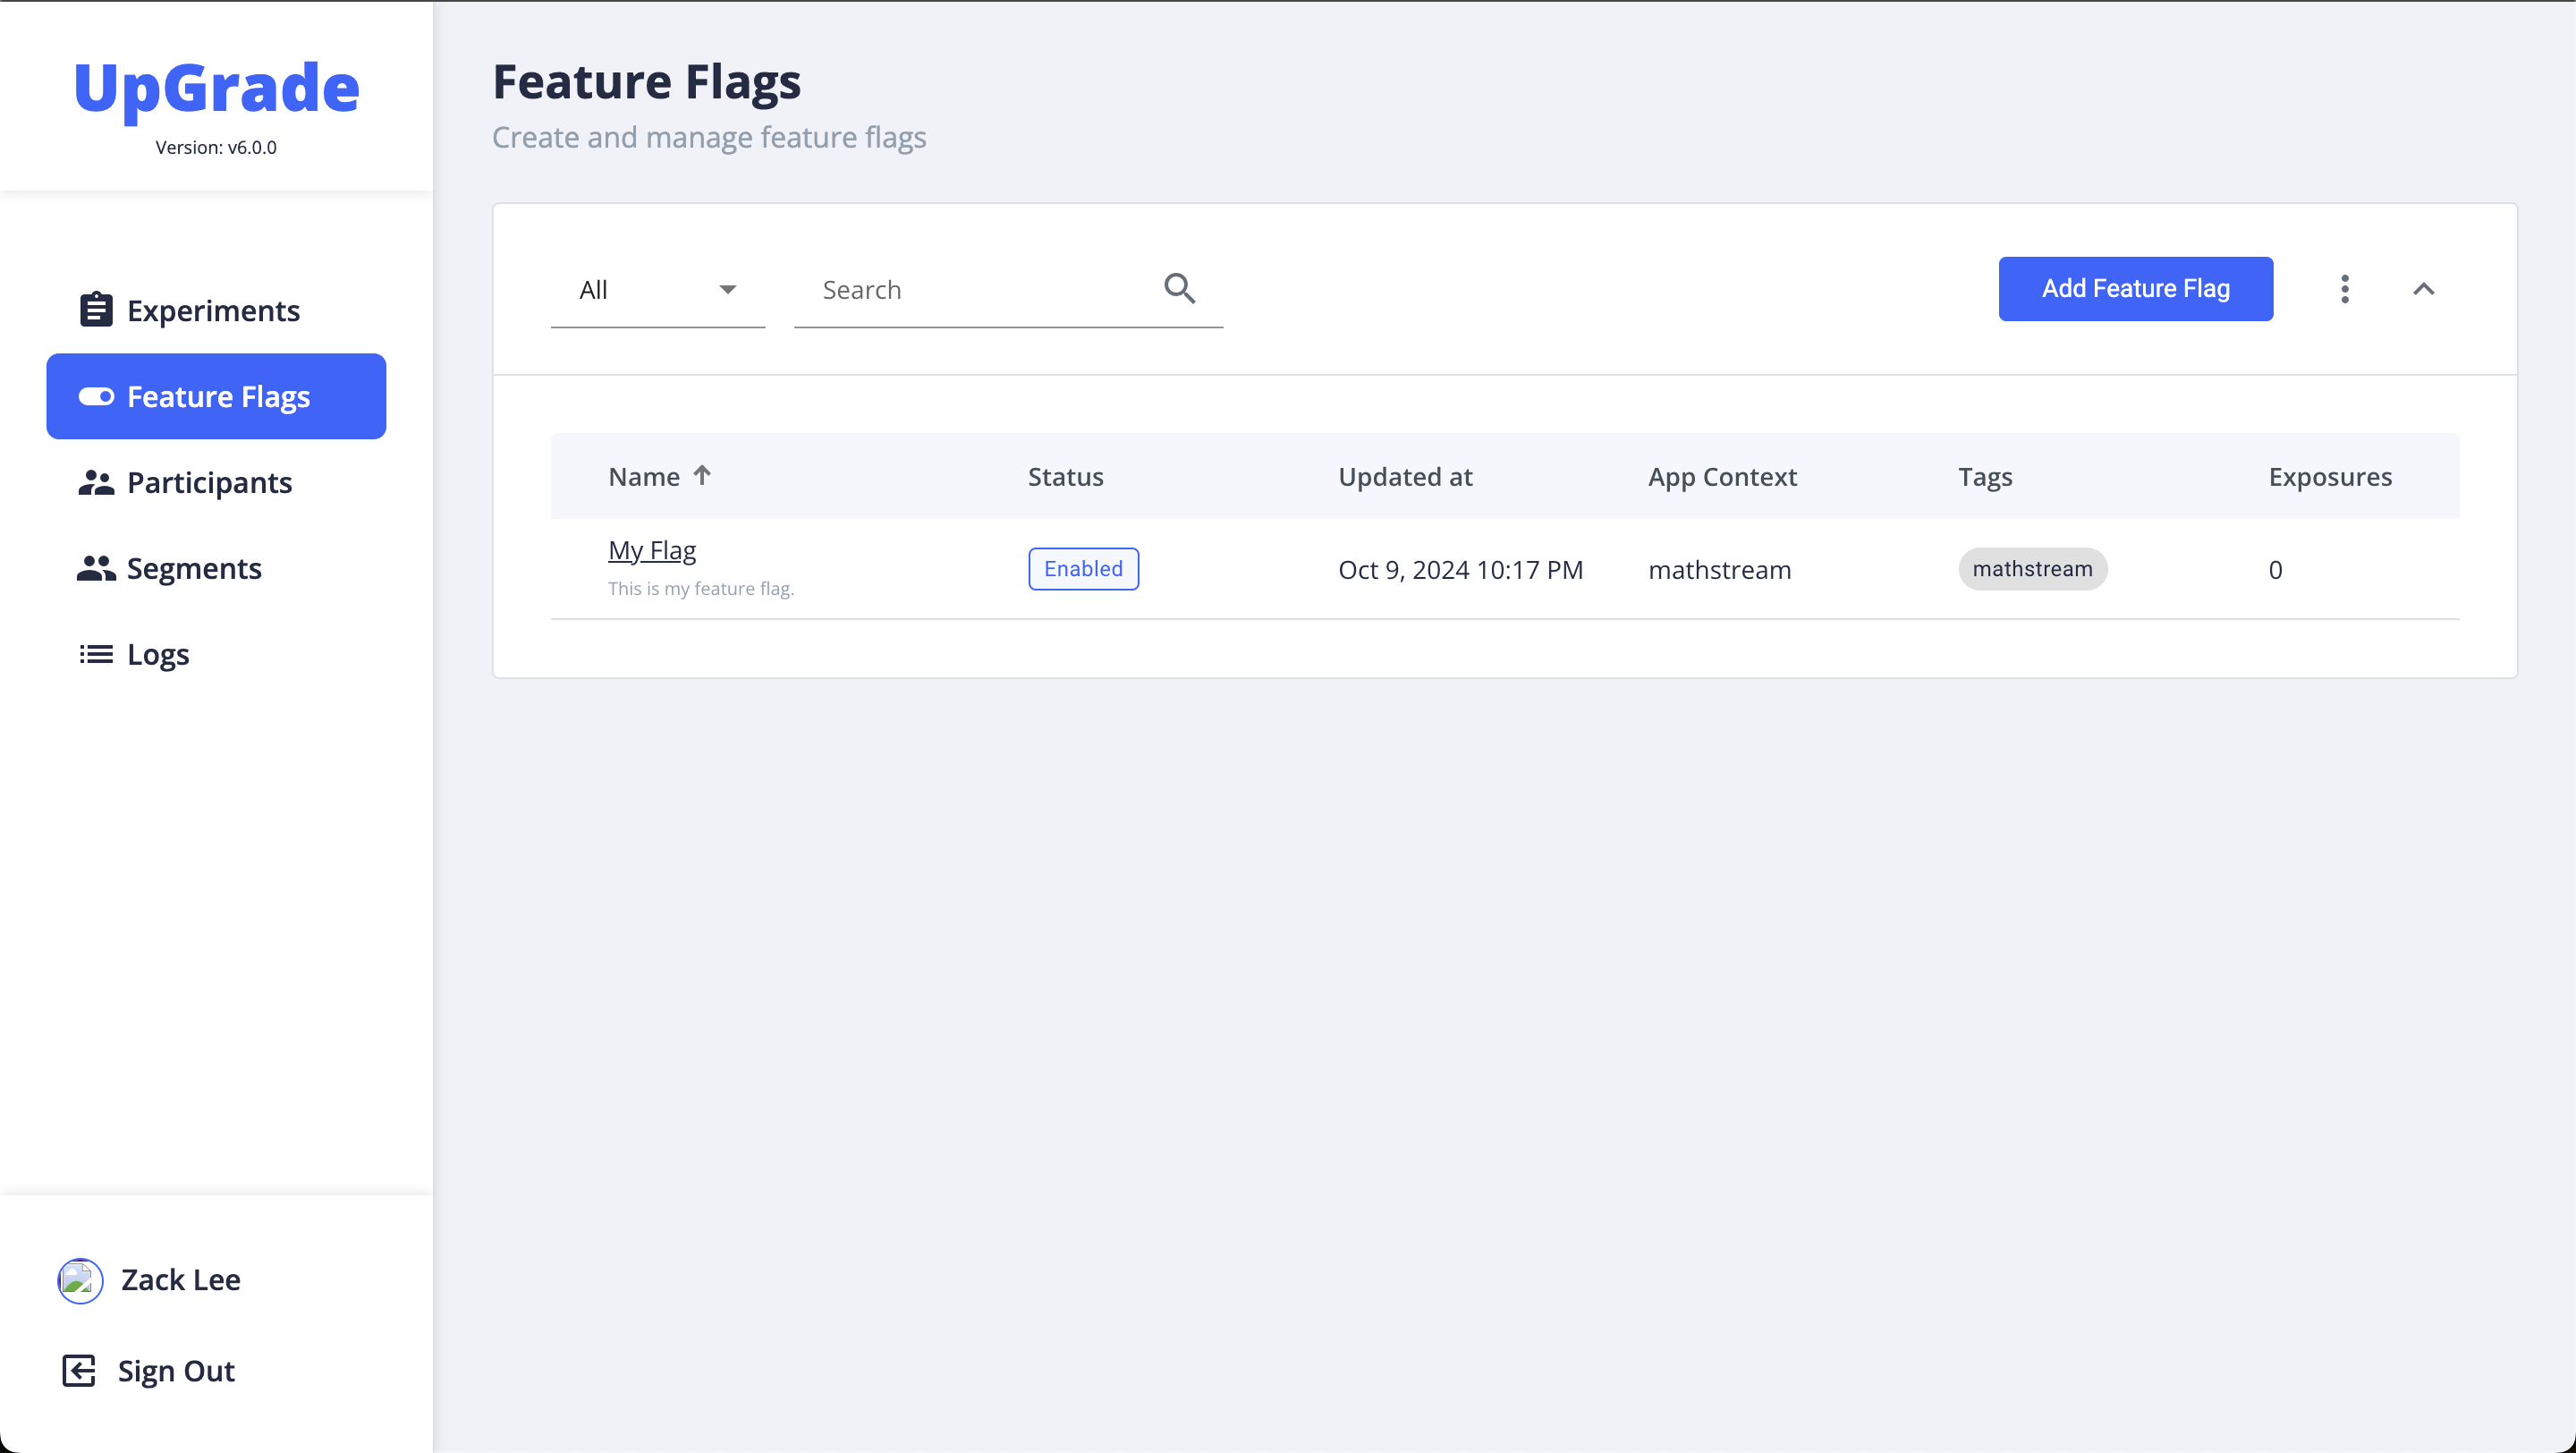
After logging in to the UpGrade portal, navigate to the **Feature Flags** section from the left-hand sidebar. This is where you can view, create, and manage all your feature flags.
If no feature flags have been created yet, the list will be empty. To begin creating a feature flag, click on the **Add Feature Flag** button located on the top right of the screen.
#### Step 2: Define the Feature Flag Properties
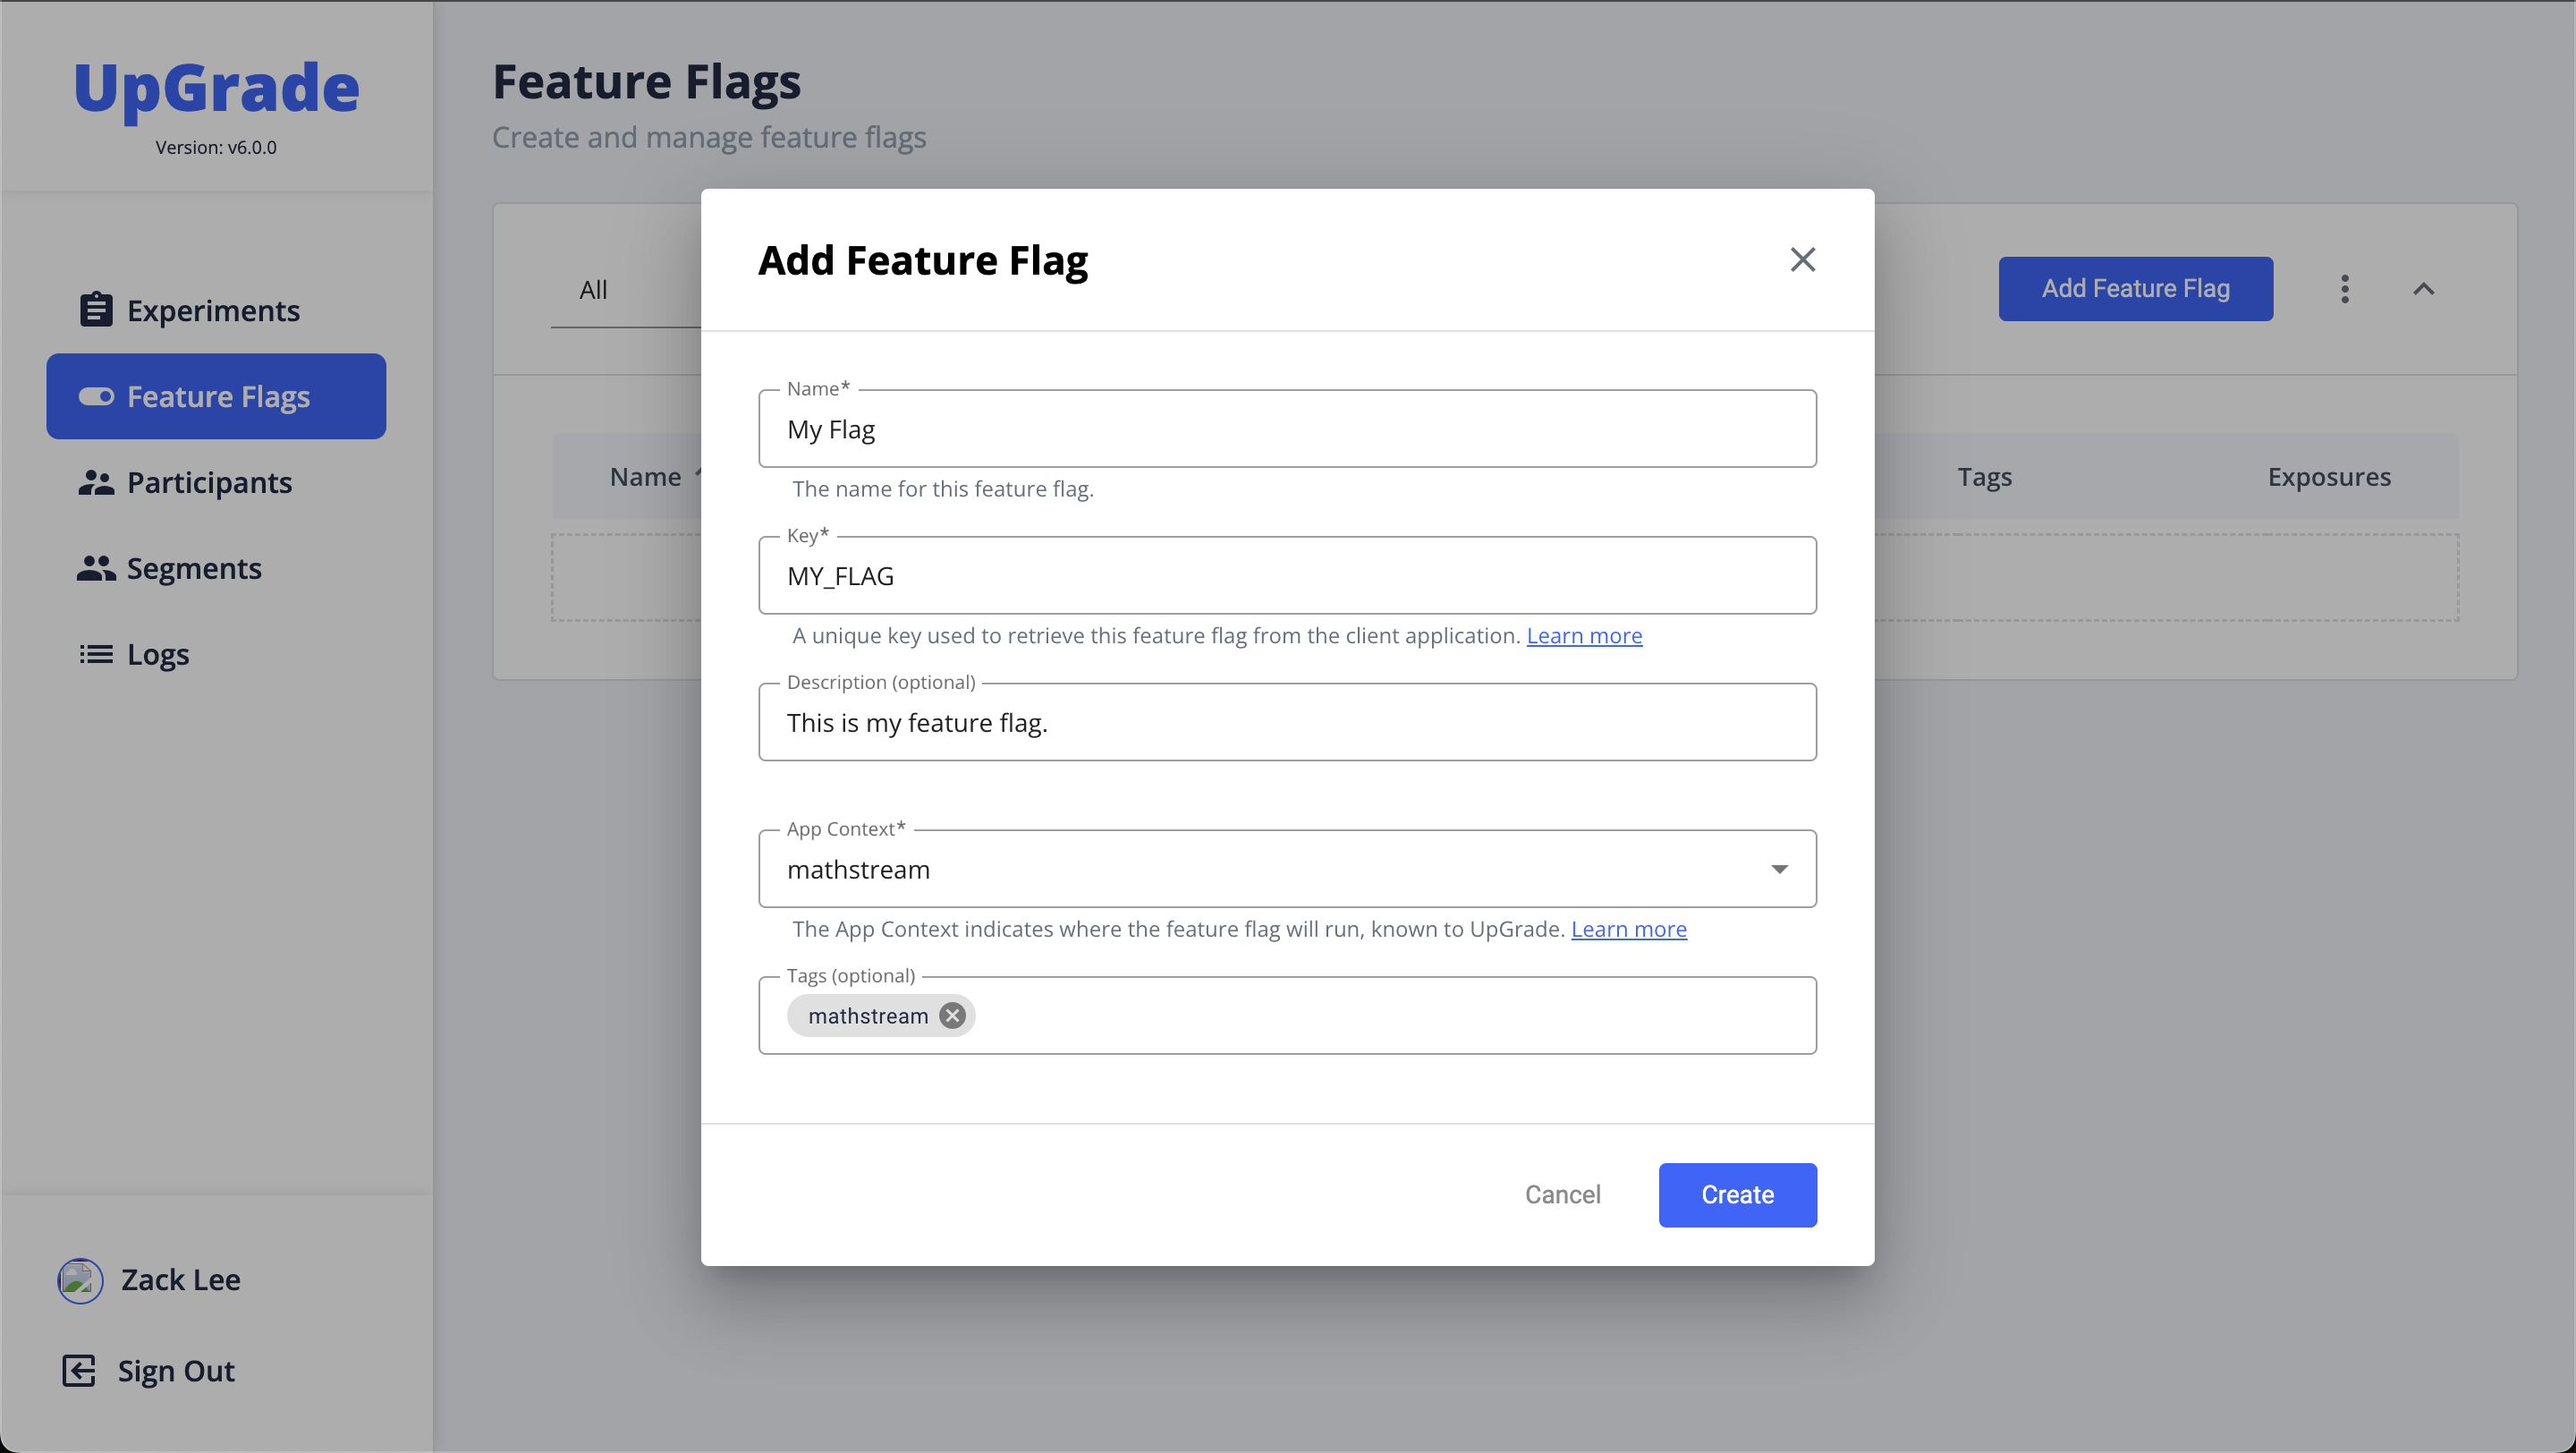
In the "Add Feature Flag" dialog, you’ll need to define the following properties:
1. **Name**: Enter a descriptive name for your feature flag. For example, “My Flag.”
2. **Key**: Provide a unique key identifier that the client application will use to retrieve the feature flag. For example, “MY\_FLAG.”
3. **Description**: (Optional) Add a brief description of the feature flag, such as “This is my feature flag.”
4. **App Context**: Select the application context where this feature flag will run. This ensures the flag is linked to a specific part of your software.
5. **Tags**: (Optional) Add tags for easier organization. You can type a tag name and press enter.
After filling in these fields, click the **Create** button to save your feature flag.
#### Step 3: View and Configure the Feature Flag
Once created, you’ll be taken to the feature flag’s details page. Here, you can further configure which users will see the feature flag by defining **Include Lists** and **Exclude Lists**.
In this example, we will define an include list to specify which users should experience the feature associated with this flag.
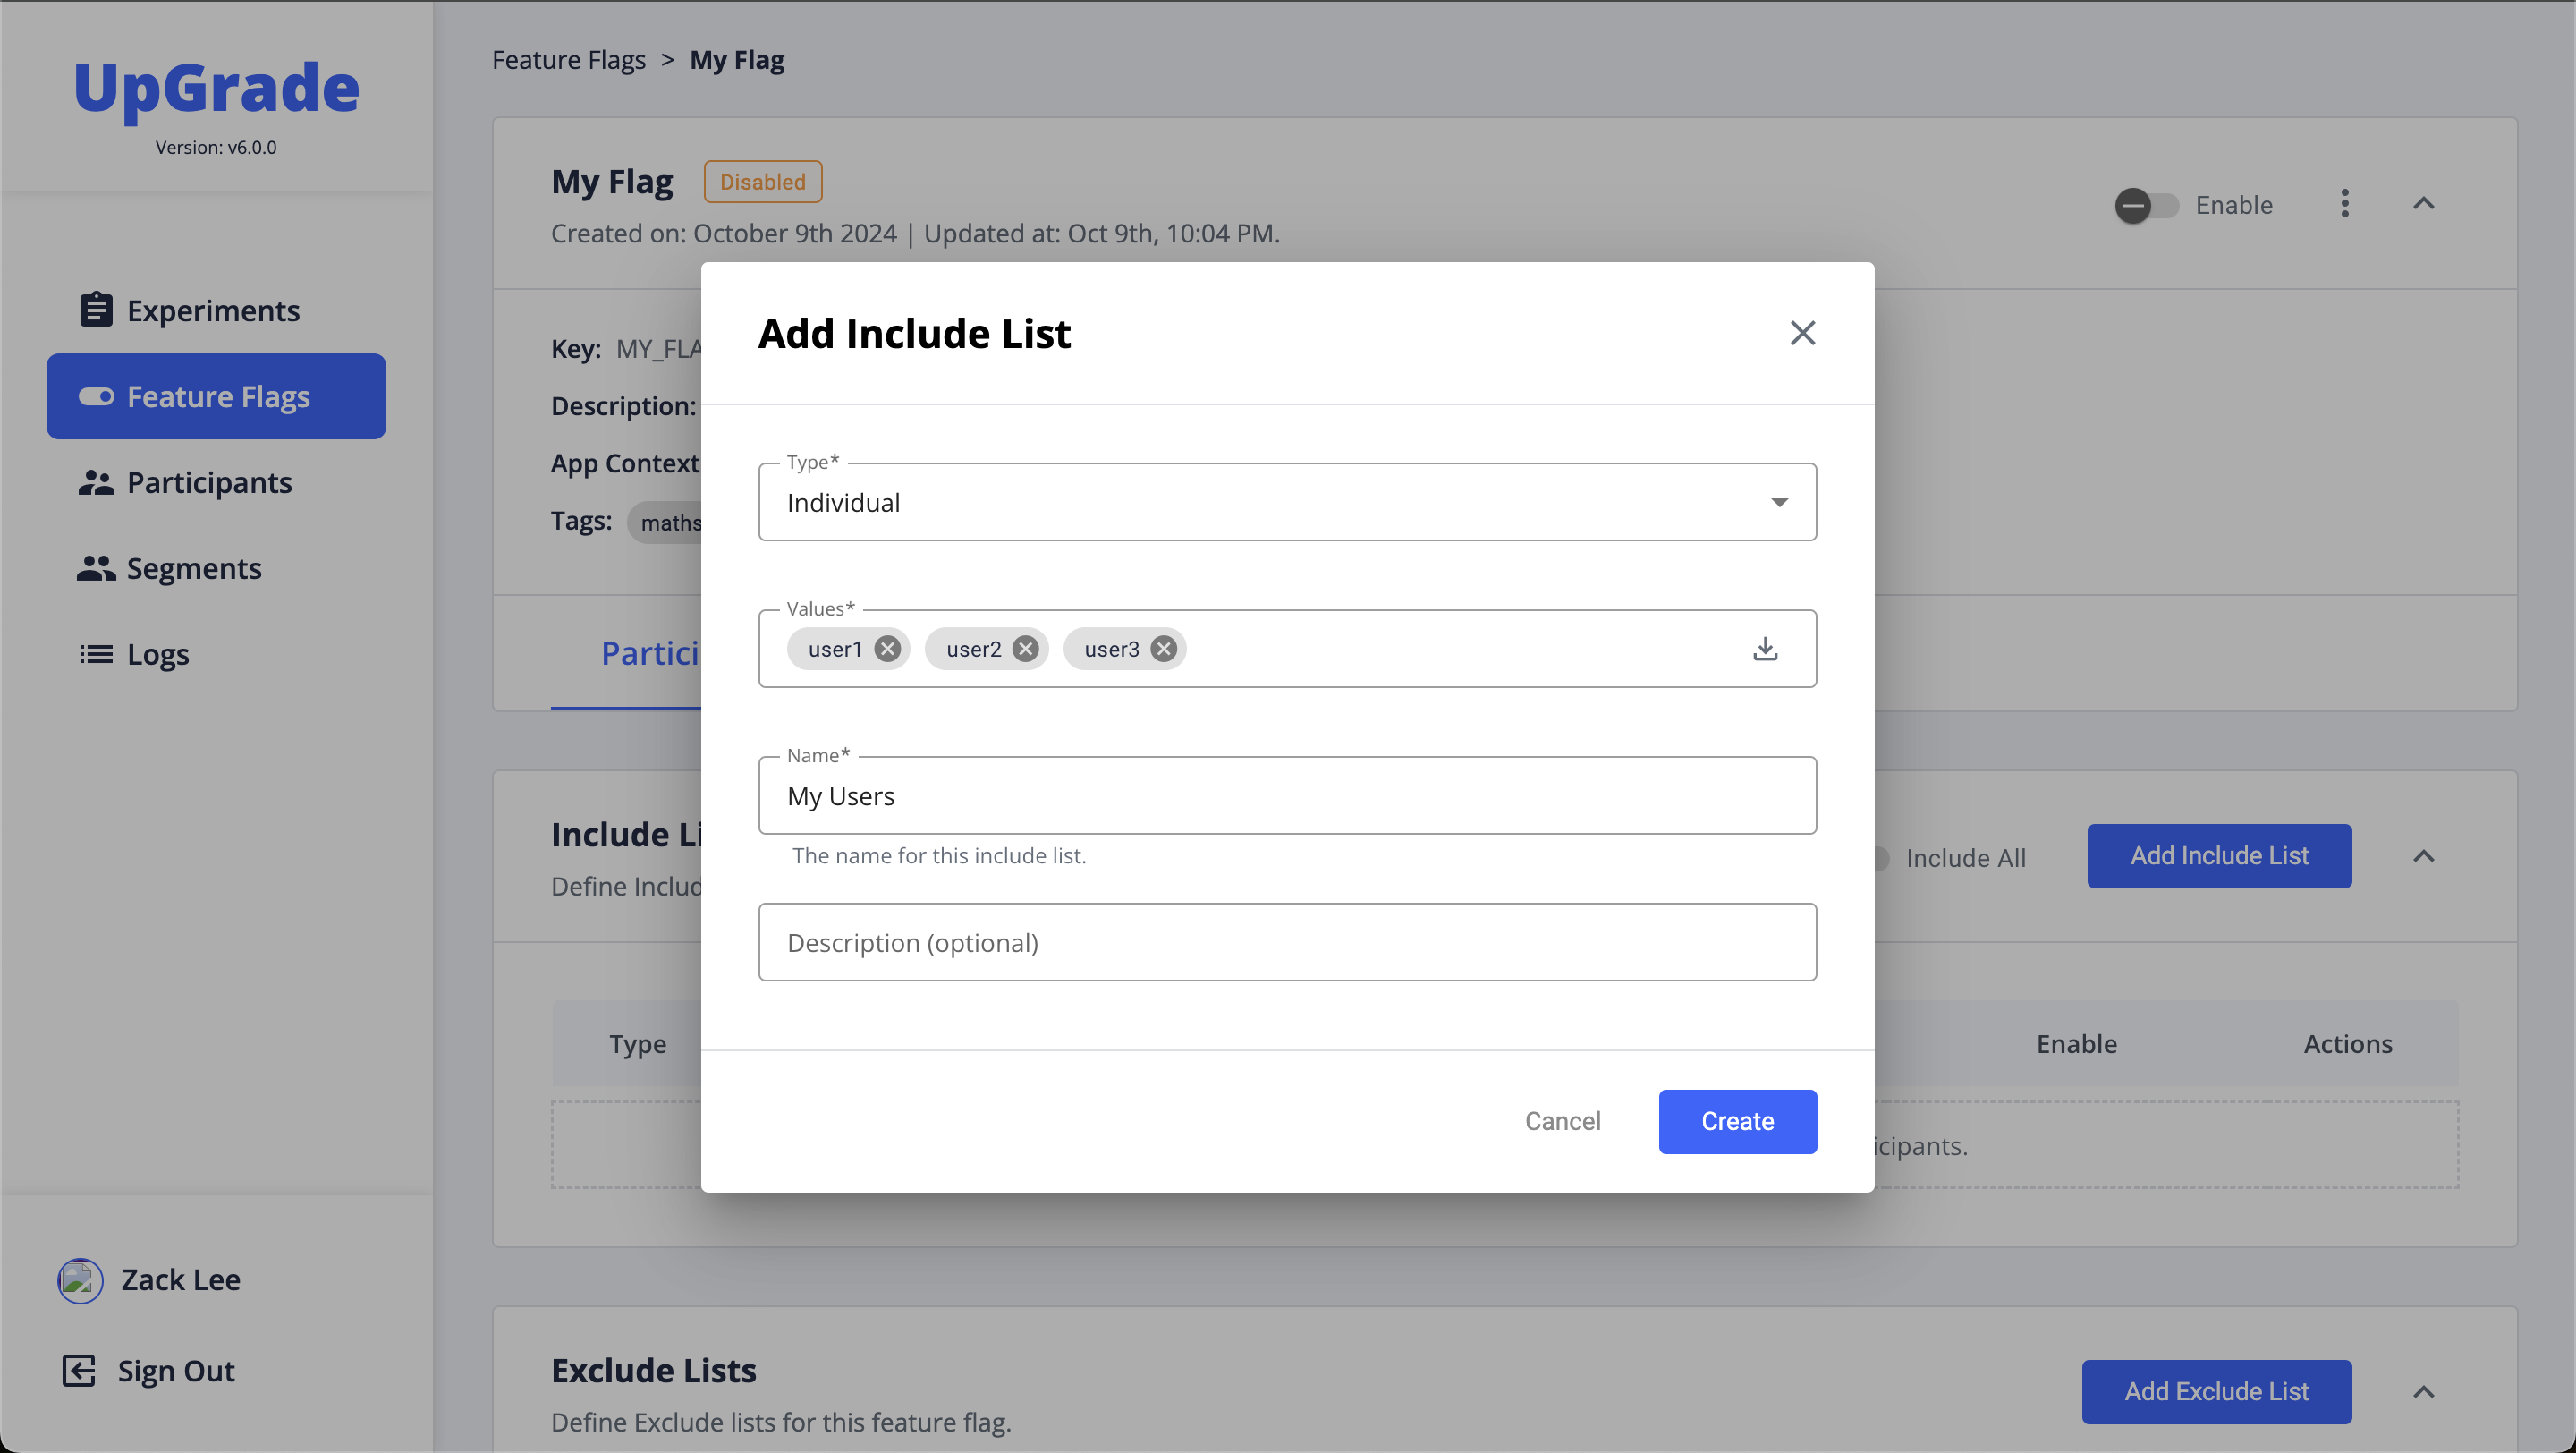
#### Step 4: Add an Include List
1. In the **Include Lists** section, click **Add Include List**.
2. Choose a **Type** from the dropdown. For this example, select **Individual**.
3. In the **Values** field, enter the user IDs that should be included, separated by commas (e.g., `user1, user2, user3`).
4. In the **Name** field, give this include list a meaningful name, such as “My Users.”
5. (Optional) Add a description if needed.
Click **Create** to add this include list to the feature flag. The include list will appear in the **Include Lists** section, where you can enable or disable it as needed.
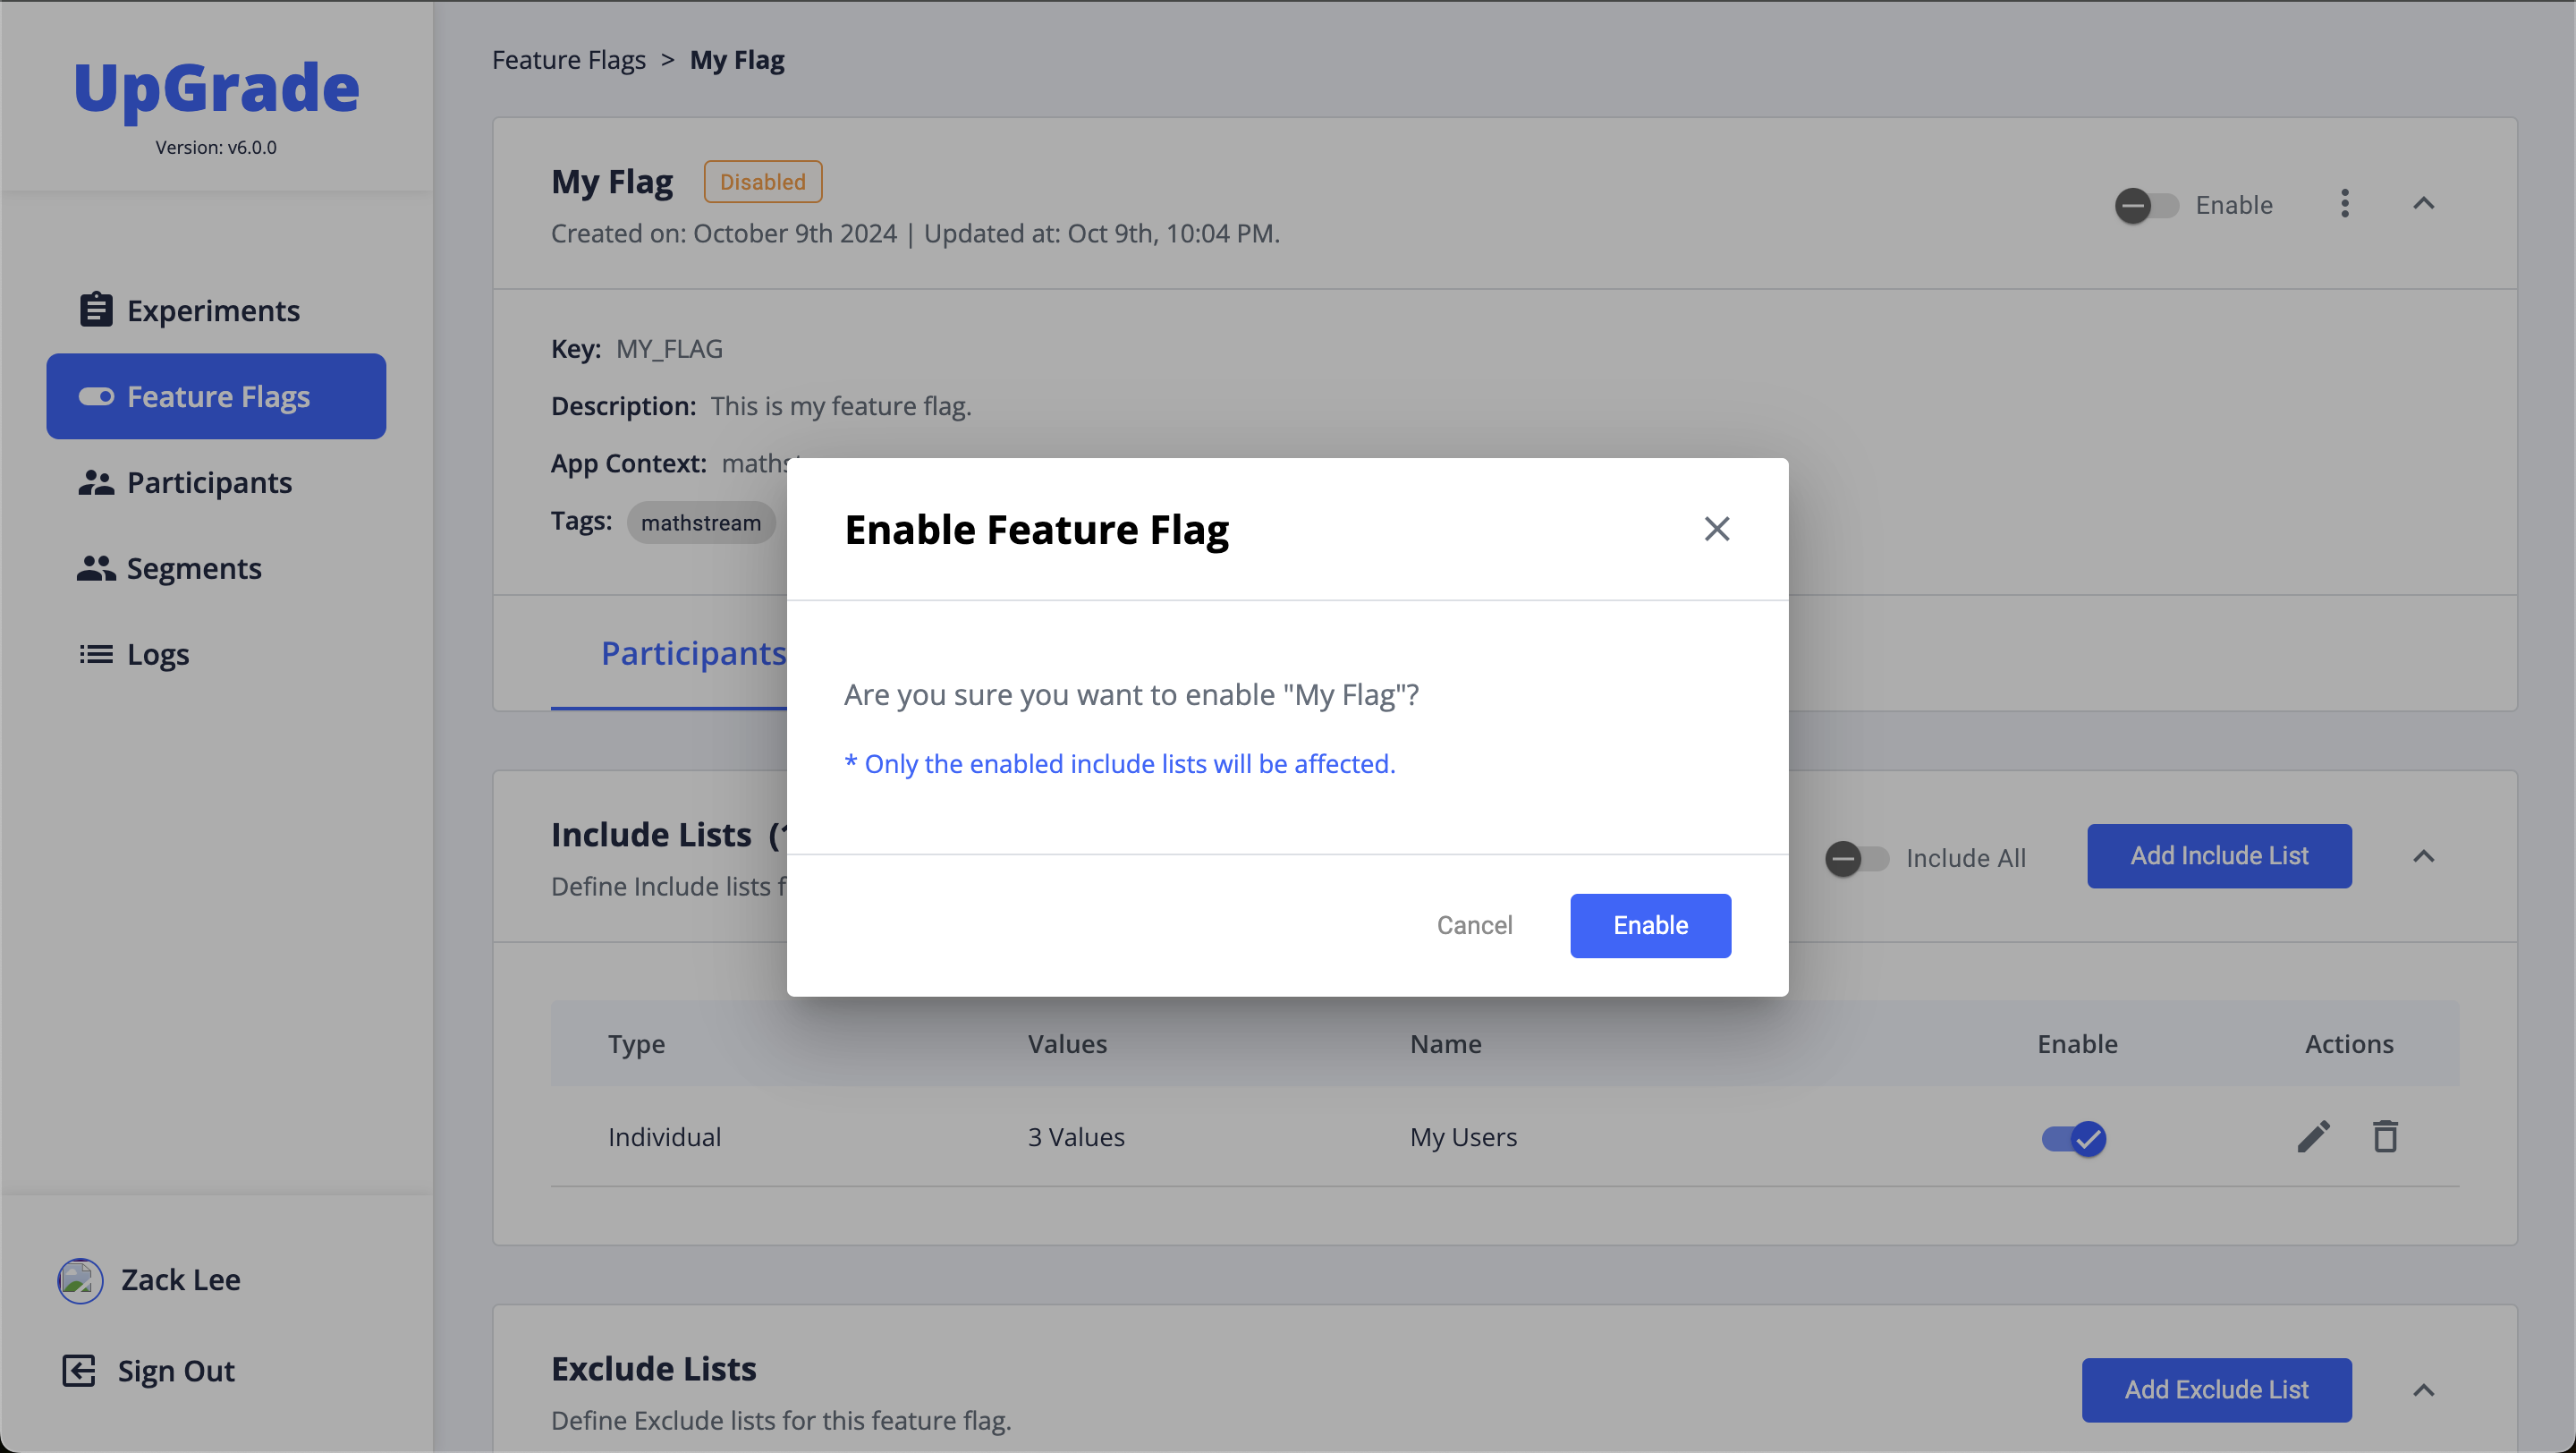
#### Step 5: Enable the Include List
To activate the include list for the feature flag, toggle the switch next to the list you created. You will be prompted to confirm this action. Click **Enable** to proceed.
Once enabled, the include list will dictate which users will see the feature associated with the flag. You can have multiple include or exclude lists, and enable or disable them as needed.
#### Step 6: Enable the Feature Flag
With the include list set up, you can now enable the feature flag itself. To do this, toggle the **Enable** switch at the top right of the feature flag’s details page. Confirm the action by clicking **Enable** in the pop-up dialog.
#### Final Confirmation
After enabling the feature flag, it will immediately apply to the users or groups defined in the enabled include lists. You can always return to the Feature Flags Root page to view existing feature flags or create a new one.
---
# Agent Instructions: Querying This Documentation
If you need additional information that is not directly available in this page, you can query the documentation dynamically by asking a question.
Perform an HTTP GET request on the current page URL with the `ask` query parameter:
```
GET https://upgrade-platform.gitbook.io/upgrade-documentation/creating-a-feature-flag.md?ask=
```
The question should be specific, self-contained, and written in natural language.
The response will contain a direct answer to the question and relevant excerpts and sources from the documentation.
Use this mechanism when the answer is not explicitly present in the current page, you need clarification or additional context, or you want to retrieve related documentation sections.