πŸ“—
UpGrade Platform - Documentation
6.0
6.0
  • UpGrade Overview
  • Creating an Experiment
    • Unit of Assignment
    • Simple Experiment
    • Factorial Experiment
    • Inclusion and Exclusion
    • Schedule and Post-Rule
    • Exporting Experiment Data and Design
  • Creating a Feature Flag
  • How UpGrade Works
  • Researcher Guide
  • Developer Guide
    • ⚑Quick Start: Running UpGrade Locally with Docker
    • ⚑Quick Start: Running locally w/o Docker
    • UpGrade + AdapComp (Mooclet) in Docker
    • πŸšΆβ€β™€οΈWalkthroughs
      • Your Application and UpGrade
      • Example 1: A Quiz Web App
      • Example 2: An Online Math Game
    • πŸ“šReference
      • API
      • Client Libraries
        • TypeScript / JS
          • Class: UpgradeClient
          • Class: Assignment
          • SDK Interfaces
            • Interface: IMetric
            • Interface: IExperimentUser
            • Interface: IExperimentUserAliases
            • Interface: ILog
            • Interface: IMarkExperimentPoint
            • Interface: IMetric
            • Interface: IRequestOptions
            • Interface: IResponse
            • Interface: IUser
            • Interface: IUserGroup
      • Environment Variables
        • Frontend Environment
        • Backend Environment
      • Context Metadata
      • Metrics
      • Setting up Google-Auth
      • API Authorization
      • Data Architecture
    • πŸ‘¨β€πŸ’»Contributing Code
      • Branching Workflow (Git-Flow)
      • Pull Request Expectations
    • πŸ˜…Troubleshooting
      • Relation β€˜experiment_condition’ already exists
      • User not found. Authorization error
      • Token is not present in the request header
      • nodemon exits without explanation
      • Unable to find New Relic module configuration
      • No email received for export data
      • Opening a new tab in UpGrade prompts for re-authorization
      • Error: Cannot find module 'upgrade_types' (or a type from 'upgrade_types' does not exist)
  • Glossary
Powered by GitBook
On this page
  1. Developer Guide
  2. Reference

Setting up Google-Auth

Steps to create a Google Client ID to allow UI login / authenticated endpoints.

PreviousMetricsNextAPI Authorization

Last updated 3 months ago

Note: Requires a google account! (personal or business)

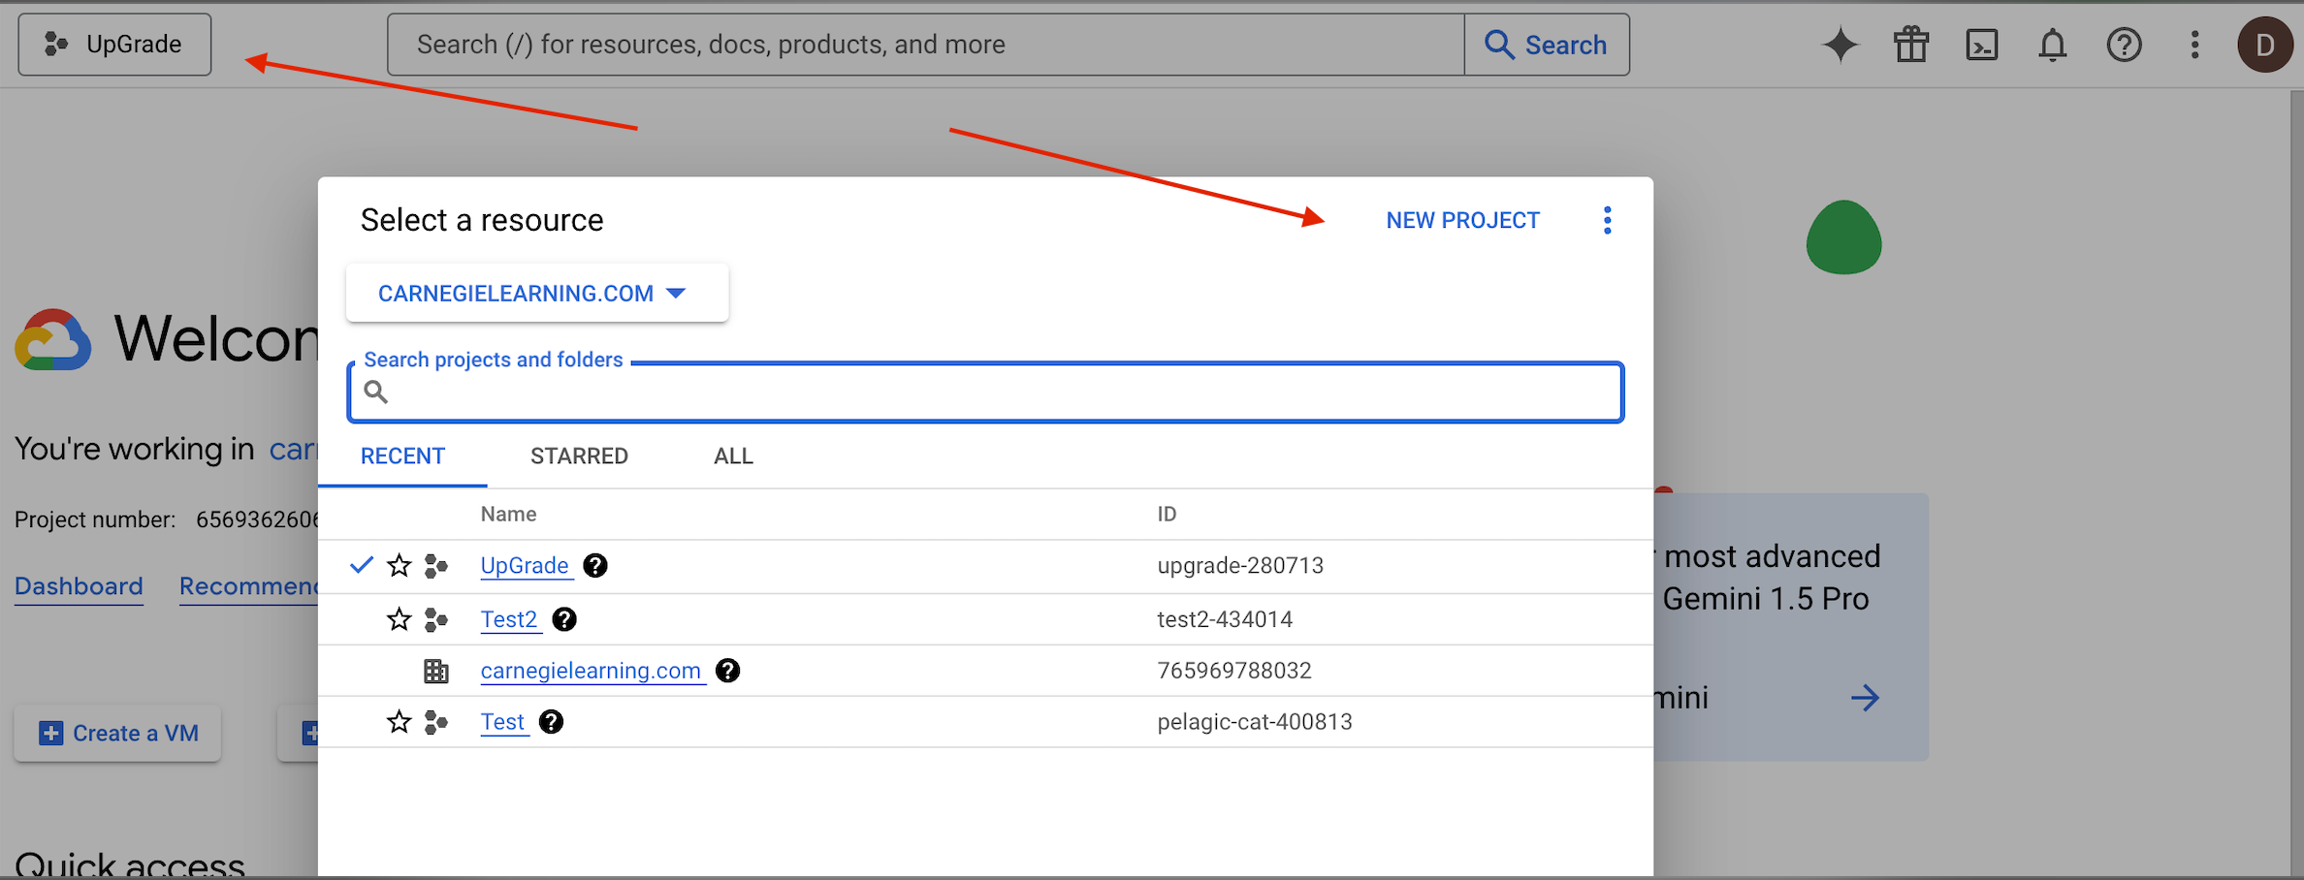
  1. Go to and click Console. You should see something like this, but sometimes this UI is not exactly the same, and may be different if empty. On left is the project selector, and New Project is there on the right.
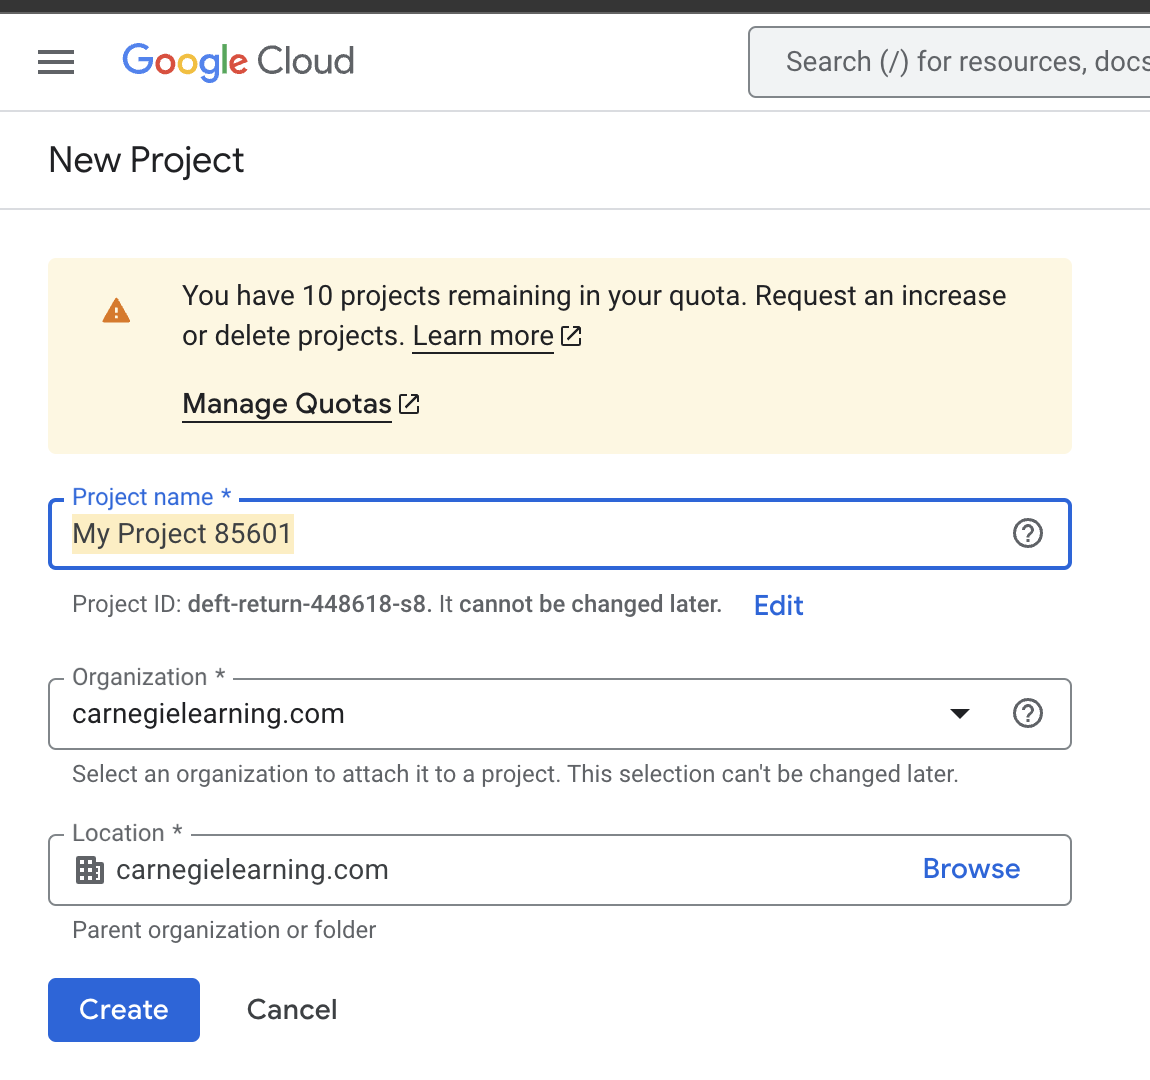
  2. You will Create a New Project which you can call "Upgrade API".
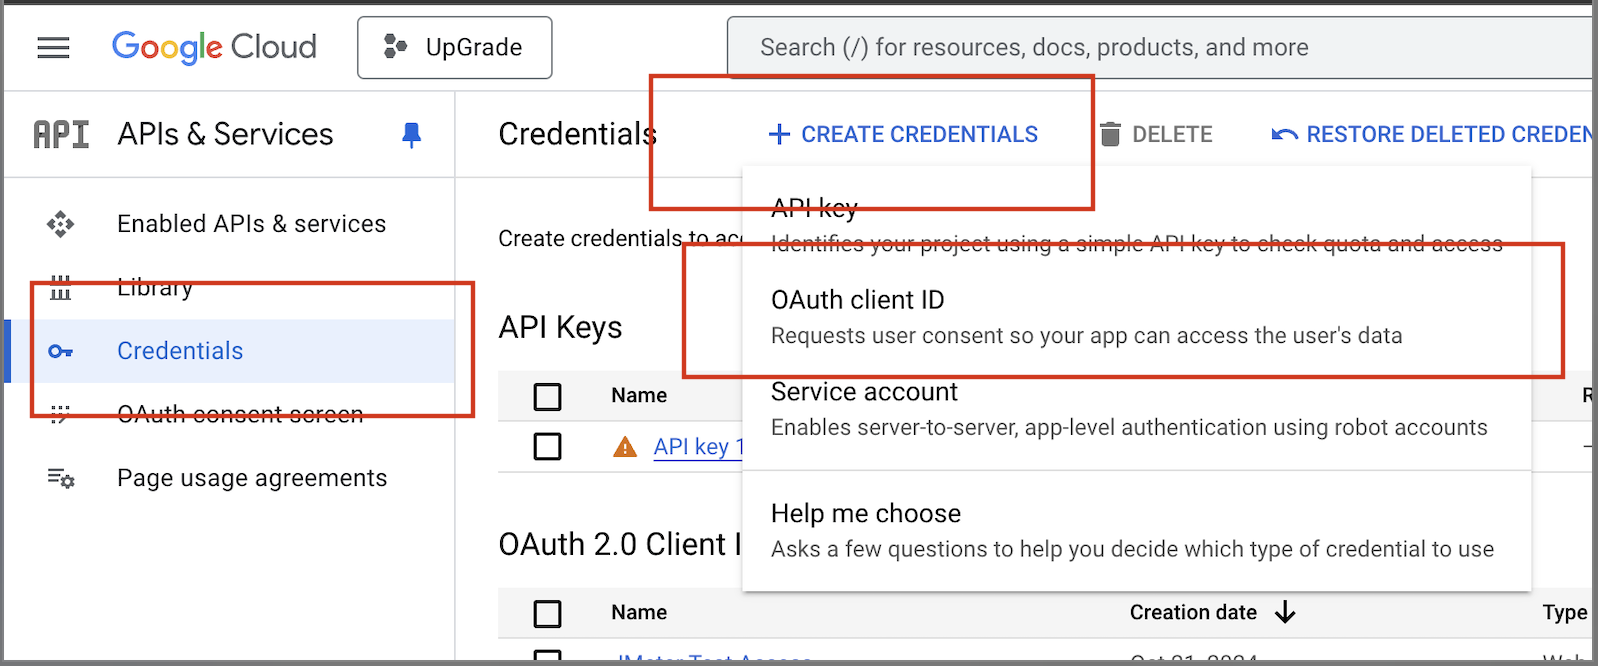
  3. Select APIs and Services

  4. Go to Credentials > + Create Credentials > OAuth client ID
  5. Create the OAuth client ID:

    • Select application type (Web)

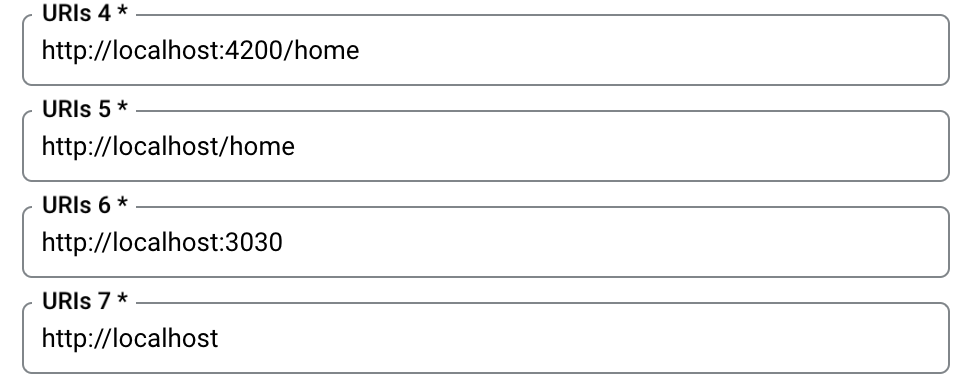
    • Add Authorized Redirect URIs for your app. This depends on your domain setup for deployed instances but for local you will want to include these for the UI:

    • Add Authorized Redirect URLs. This is what we have, it should do the trick
  6. Click Create and find your your Client ID on the resultant page. This is your GOOGLE_CLIENT_ID. Your client ID will look like: xxxxxxxxxxxx-xxxxxxxxxxxxxxxxxxxxxxxxxxxxxxxx.apps.googleusercontent.com

  7. This will be the id that is used in your GOOGLE_CLIENT_ID in your backend .env and in your frontend environment.ts files.

This may take a few minutes, then open the frontend and you should see this screen. You may or may not automatically see your google account name and picture populate the login button. Click this and login with a google user account.
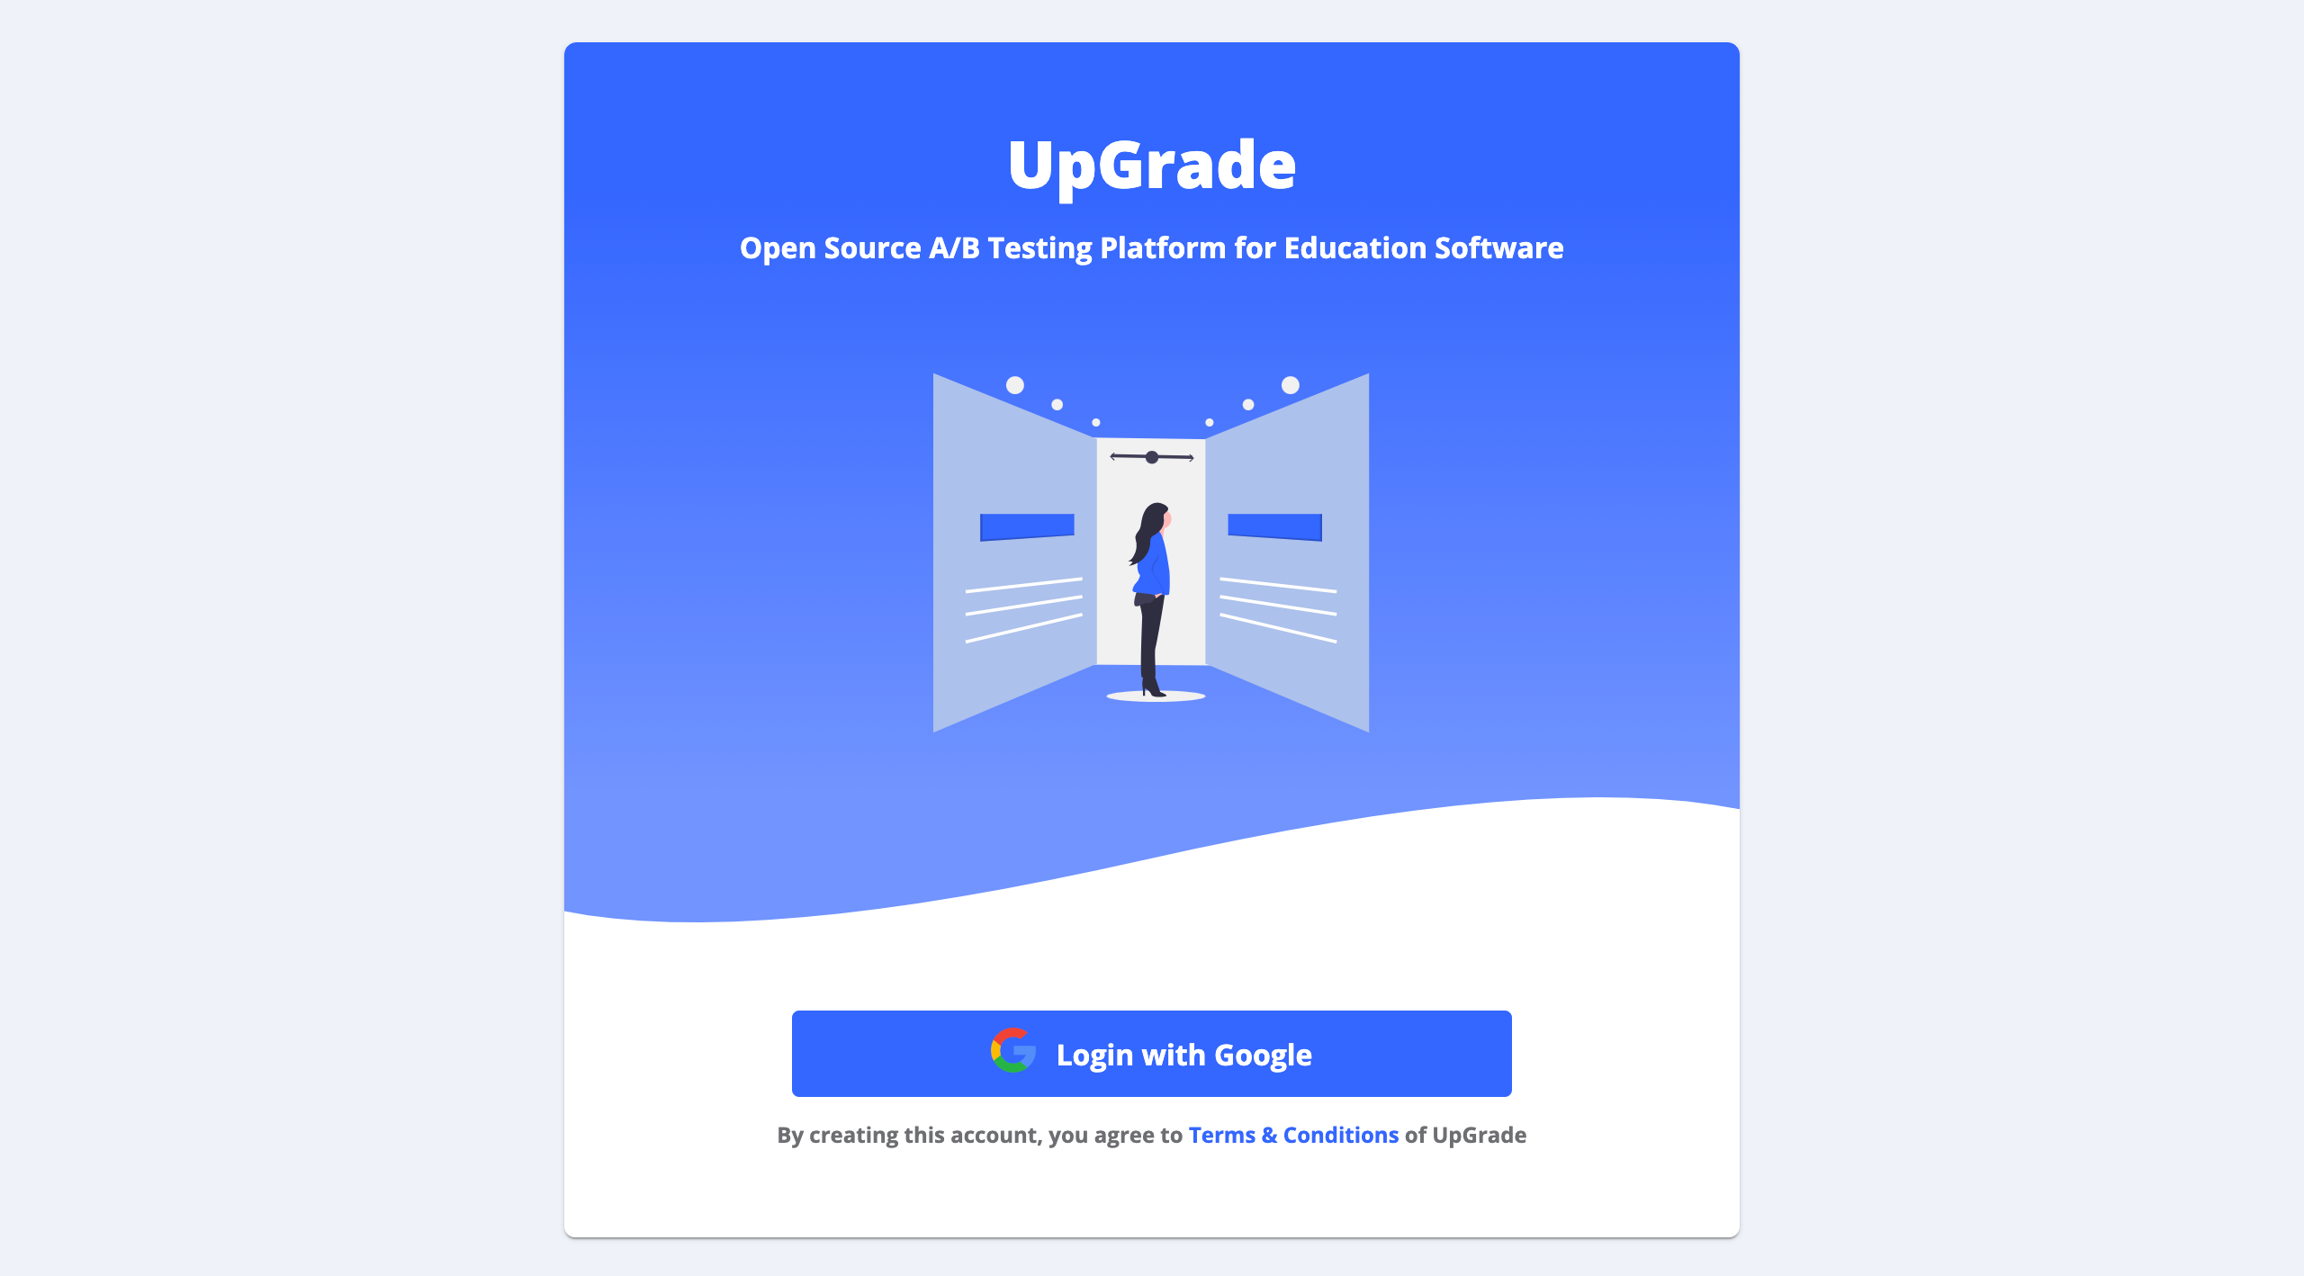
Finally your Upgrade frontend is deployed successfully!!!

Login using the gmail id with the domain specified during the deployment and you are ready to create experiments.

πŸ“š
console.cloud.google.com
Upgrade Login Screen